


Trive verification is a mandatory 3-step process that provides full access to the broker's financial services. Required documents include proof of identity (POI) and proof of address (POA) issued within the last 3-6 months.
After verifiying your account, you can securely start trading on Classic, Prime, and Prime Plus accounts with low maximum leverage up to 1:30.
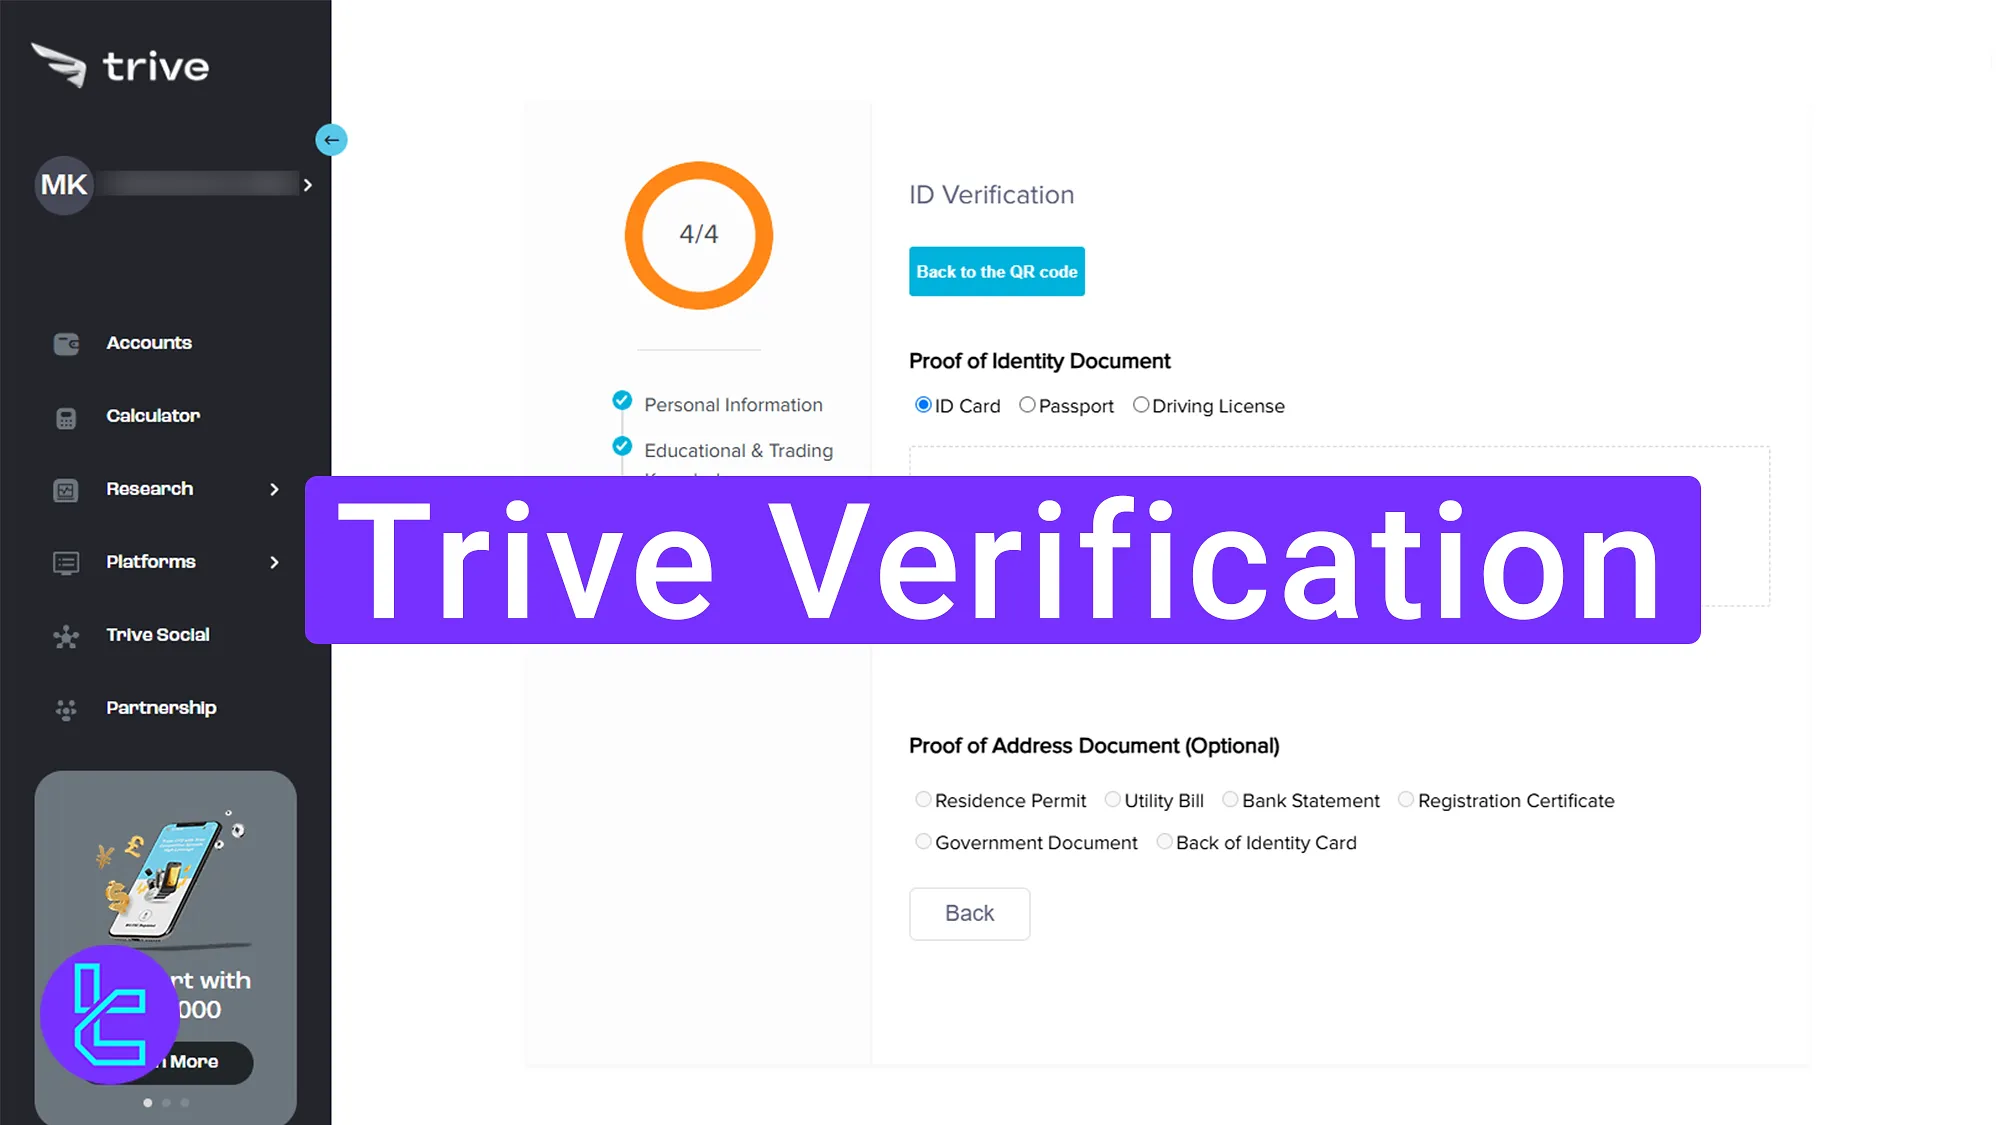
Trive Verification Process Overview
After completing the Trive registration, gain full access to financial services in the Trive broker by following these steps.
Trive verification steps:
- Access the verification area via "Open Live Account";
- Upload identity and address confirmation documents;
- Confirm status via email and dashboard updates.
Trive broker KYC requirements:
Verification Requirement | Yes/No |
Full Name | No |
Country of Residence | No |
Date of Birth Entry | No |
Phone Number Entry | No |
Residential Address Details | No |
Phone Number Verification | No |
Document Issuing Country | No |
ID Card (for POI) | Yes |
Driver’s License (for POI) | Yes |
Passport (for POI) | Yes |
Residence Permit (for POI or POA) | Yes |
Utility Bill (for POA) | Yes |
Bank Statement (for POA) | Yes |
2-Factor Authentication | No |
Biometric Face Scan | No |
Financial Status Questionnaire | No |
Trading Knowledge Questionnaire | No |
Restricted Countries | Yes |
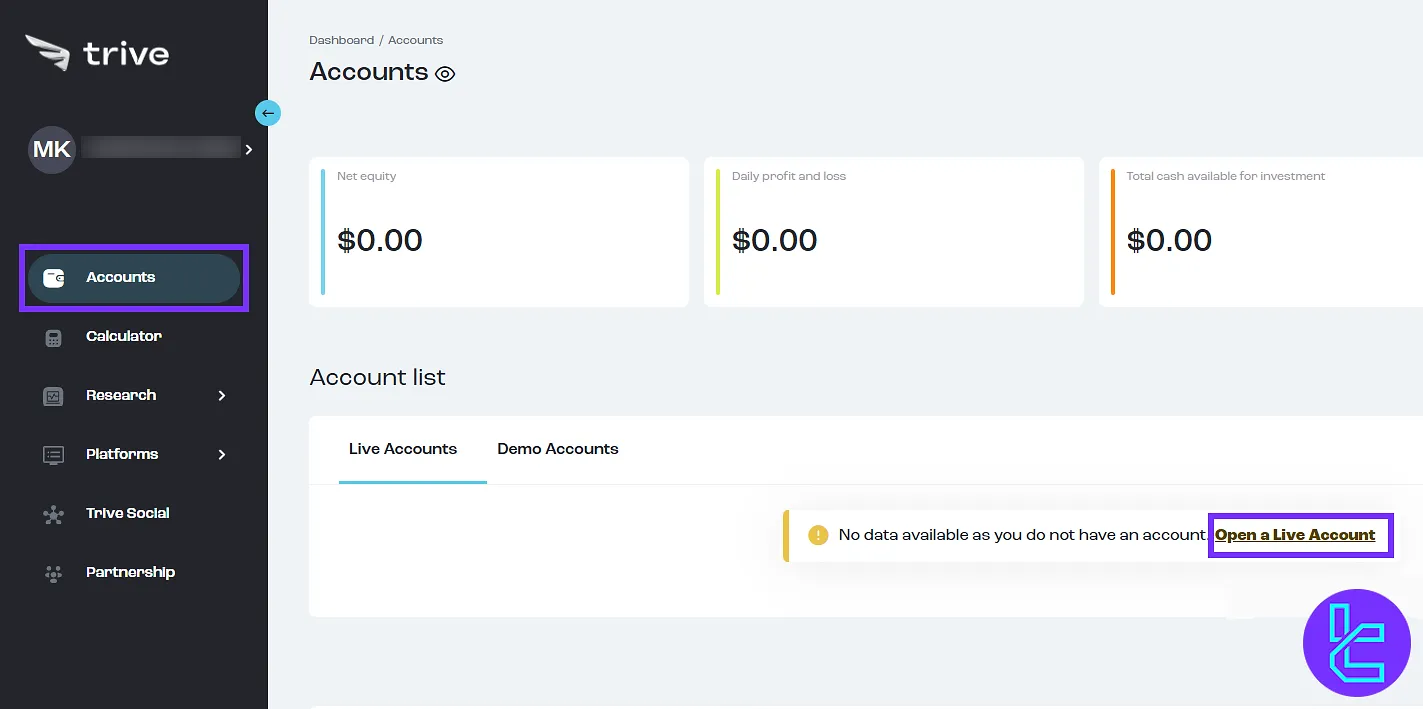
#1 Accessing the Trive Identity Confirmation Section
To begin this process, follow these steps:
- Log in to the Trive dashboard;
- Click on the "Accounts" option;
- Select "Open Live Account".
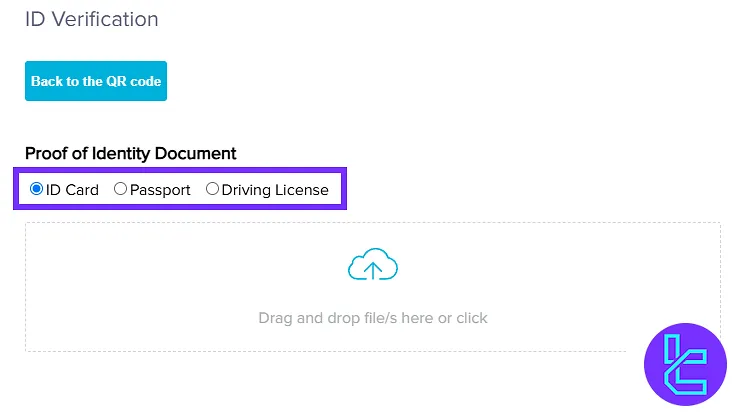
#2 Uploading Identity and Address Documents
Click on "Upload Document" to begin the manual document submission. Select the document type for identity confirmation:
- National ID card
- Passport
- Driver’s license
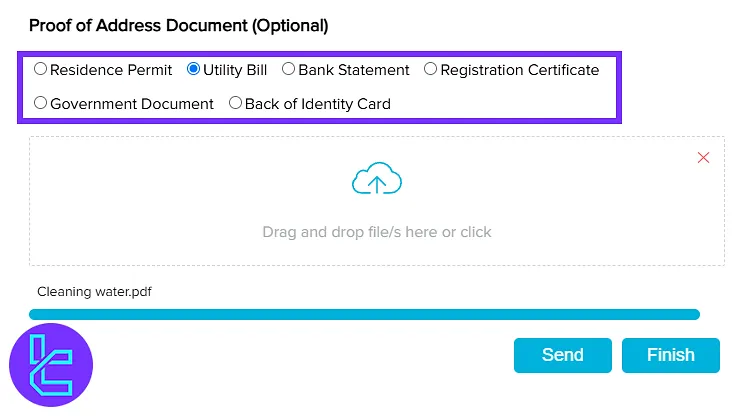
Next, select the document type for proof of address. Acceptable documents include:
- Residence Permit
- Utility Bill
- Bank Statement
- Registration Certificate
- Government Document
- Back of Identity Card
Upload the selected document and click "Send" followed by "Finish" to complete the submission.
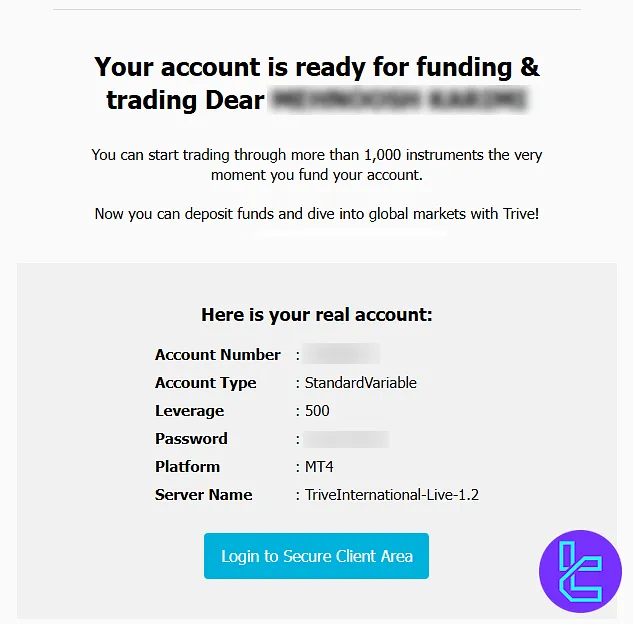
#3 Confirming User Authentication Status
After submitting the required documents, the review process begins. An email will be sent to confirm account approval once the documents are verified.
Trive KYC vs Other Forex Brokers
Below is a table showing how Trive's verification requirements differ from those of other Forex brokers.
Verification Requirement | Trive Broker | |||
Full Name | No | No | No | Yes |
Country of Residence | No | No | No | No |
Date of Birth Entry | No | No | No | Yes |
Phone Number Entry | No | No | No | No |
Residential Address Details | No | No | No | Yes |
Phone Number Verification | No | No | No | No |
Document Issuing Country | No | No | Yes | No |
ID Card (for POI) | Yes | Yes | Yes | Yes |
Driver’s License (for POI) | Yes | Yes | Yes | Yes |
Passport (for POI) | Yes | Yes | Yes | Yes |
Residence Permit (for POI or POA) | Yes | No | No | No |
Utility Bill (for POA) | Yes | Yes | No | No |
Bank Statement (for POA) | Yes | Yes | No | No |
2-Factor Authentication | No | No | No | No |
Biometric Face Scan | No | No | No | No |
Financial Status Questionnaire | No | Yes | No | Yes |
Trading Knowledge Questionnaire | No | No | No | No |
Restricted Countries | Yes | Yes | Yes | Yes |
TF Expert Suggestion
The Trive verification process is efficient and takes less than 10 minutes when documents are prepared in advance. This process requires government-issued documents (eg. ID card, utility bill, passport, etc.) for verifying your identity and address.
Now that your account is fully verified, you can manage your funds using the Trive deposit and withdrawal methods. Detailed information is available on the Trive tutorial page.


