

Bitunix TRC20 deposit can be completed in in just 3 steps and requires traders to access the "Deposit" section, enter cash-in details, and track via the “Deposit Records” section.
Step-by-Step Guide to Bitunix TRC20 Funding Process
Adding Tether (USDT) to your Bitunix exchange account via the Tron blockchain network is a beginner-friendly and straightforward process.
Bitunix TRC20 deposit overview:
- Access the Bitunix deposit section;
- Enter the cash in detail;
- Track the payment in the transaction history.
Before starting this process make sure you have completed Bitunix verification to safe guard your trading account.
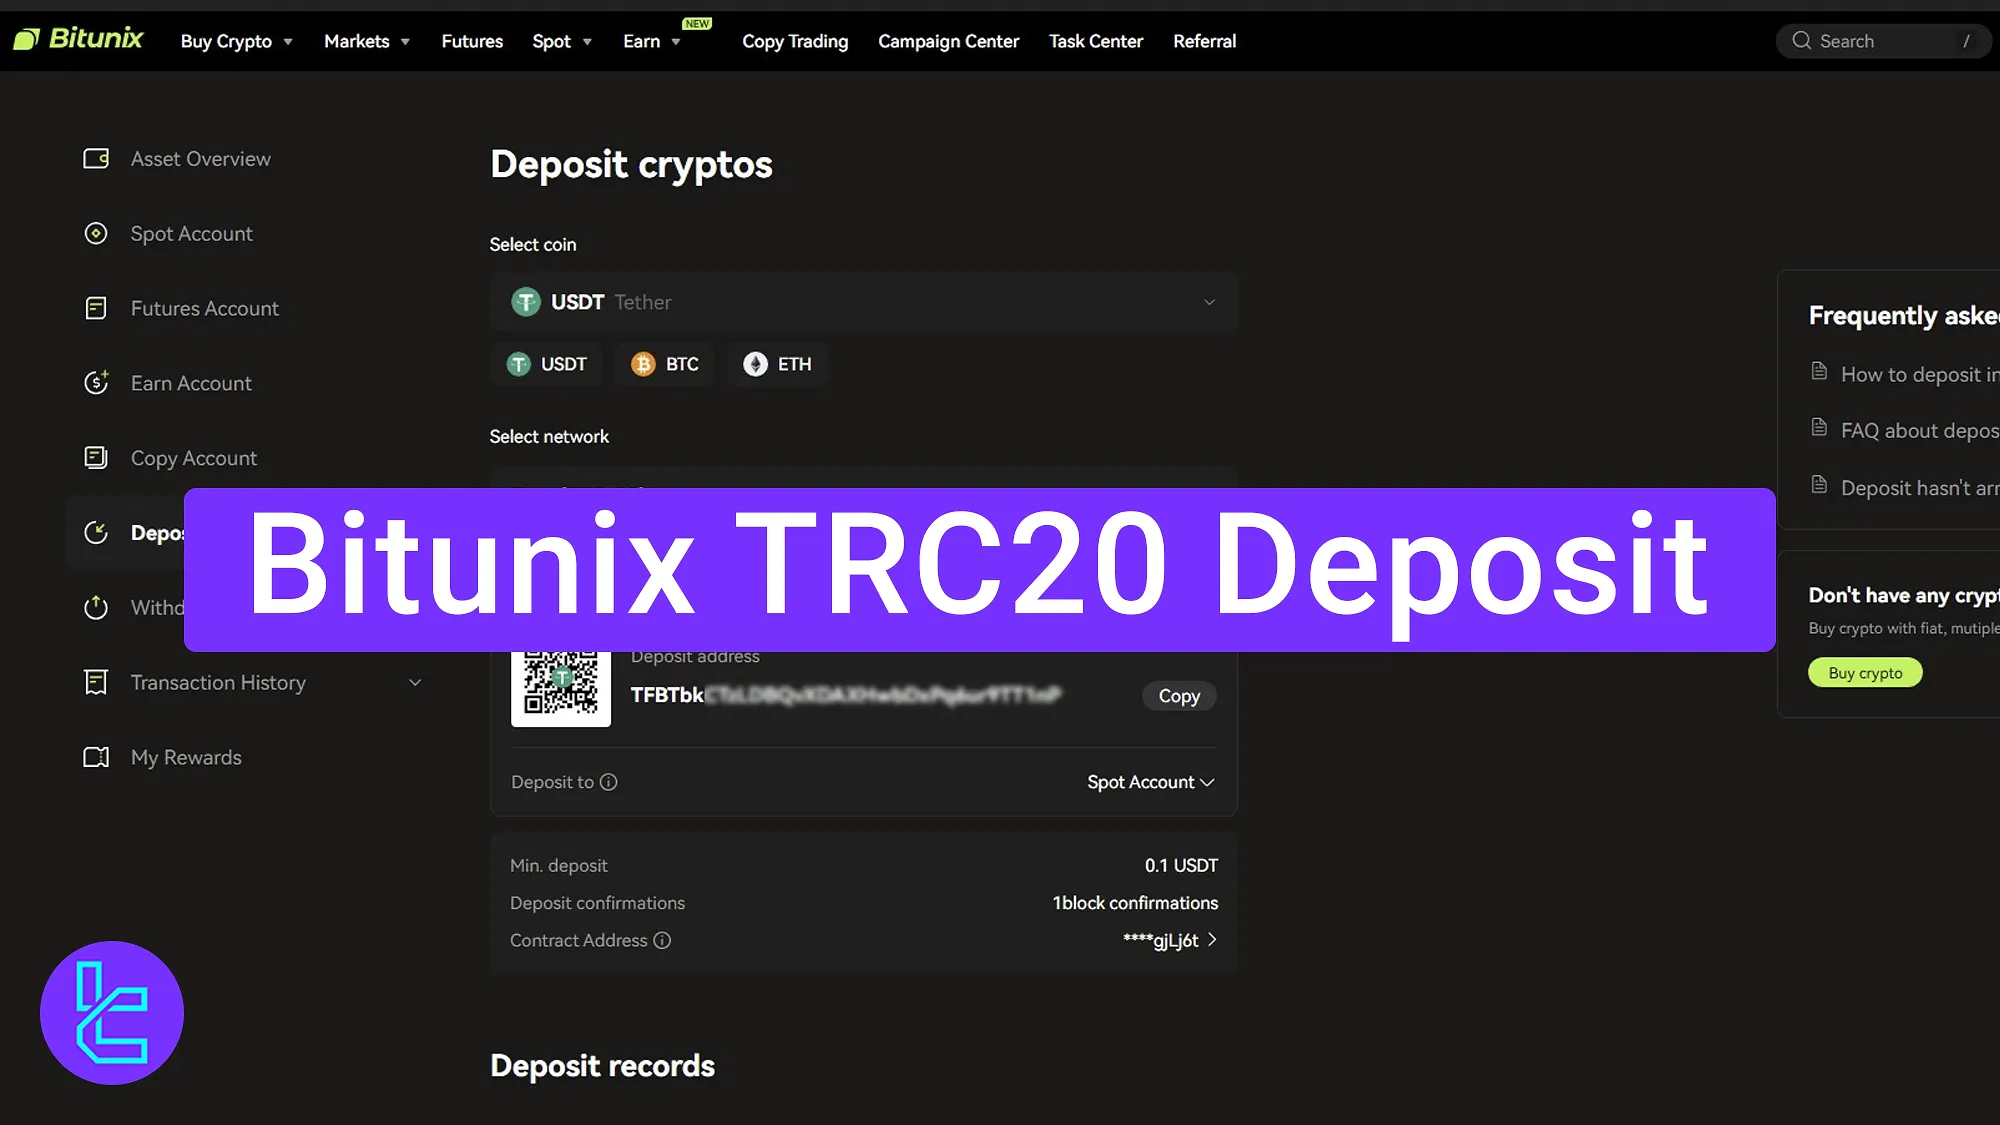
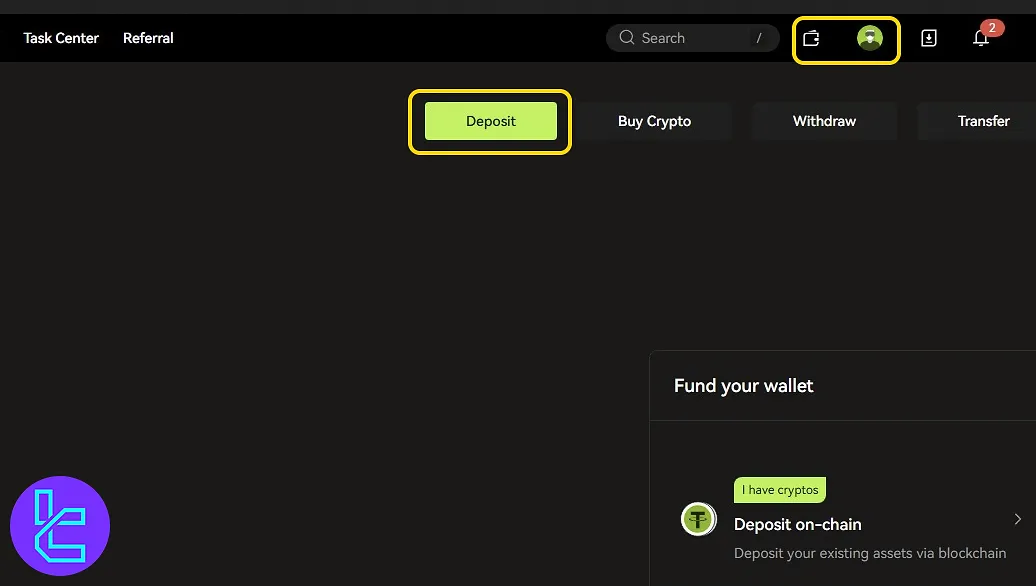
#1 Access the “Deposit” Section
To begin the process:
- Log in to your Bitunix account;
- Navigate to the "Assets" page;
- Tap on the "Deposit" option.
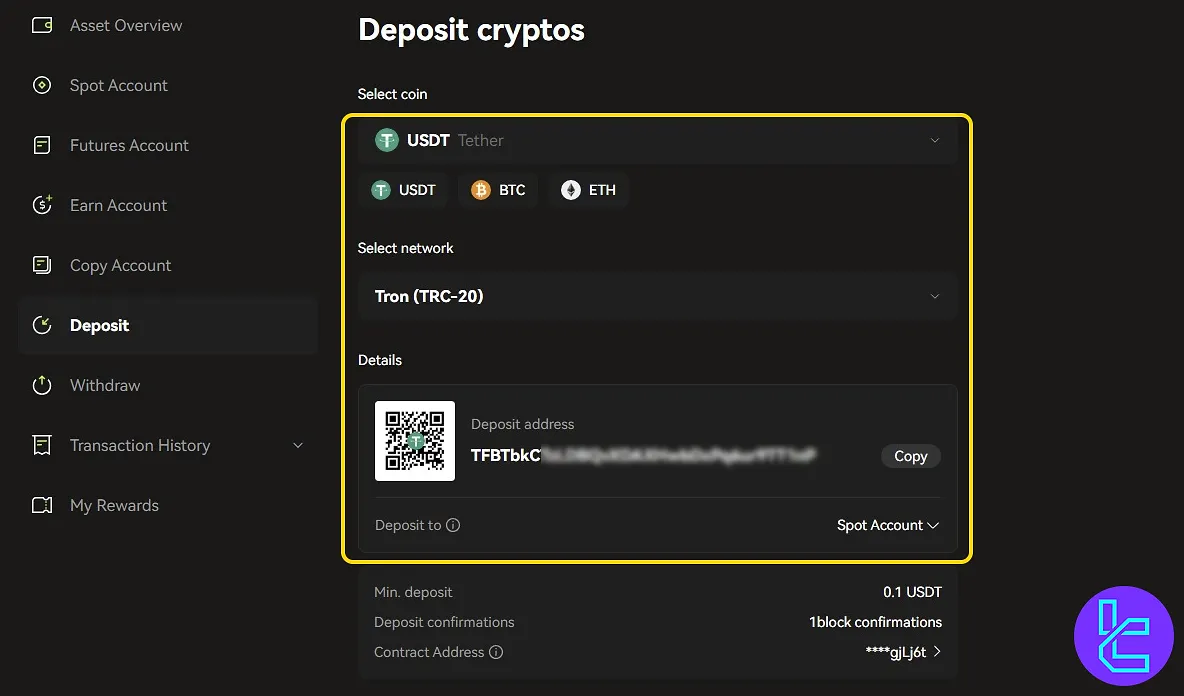
#2 Select USDT, choose the TRC20 Network, and Copy Your Wallet Address
From the coin list, select USDT as the cryptocurrency to funding. Then, choose the TRC20 network to ensure low fees and fast confirmation.
Once selected, your unique TRC20 wallet address will be generated. Copy it carefully for use in your transfer.
Paste the wallet address into your personal crypto wallet and enter your desired amount (minimum 0.1 USDT). Finally, complete the transaction.
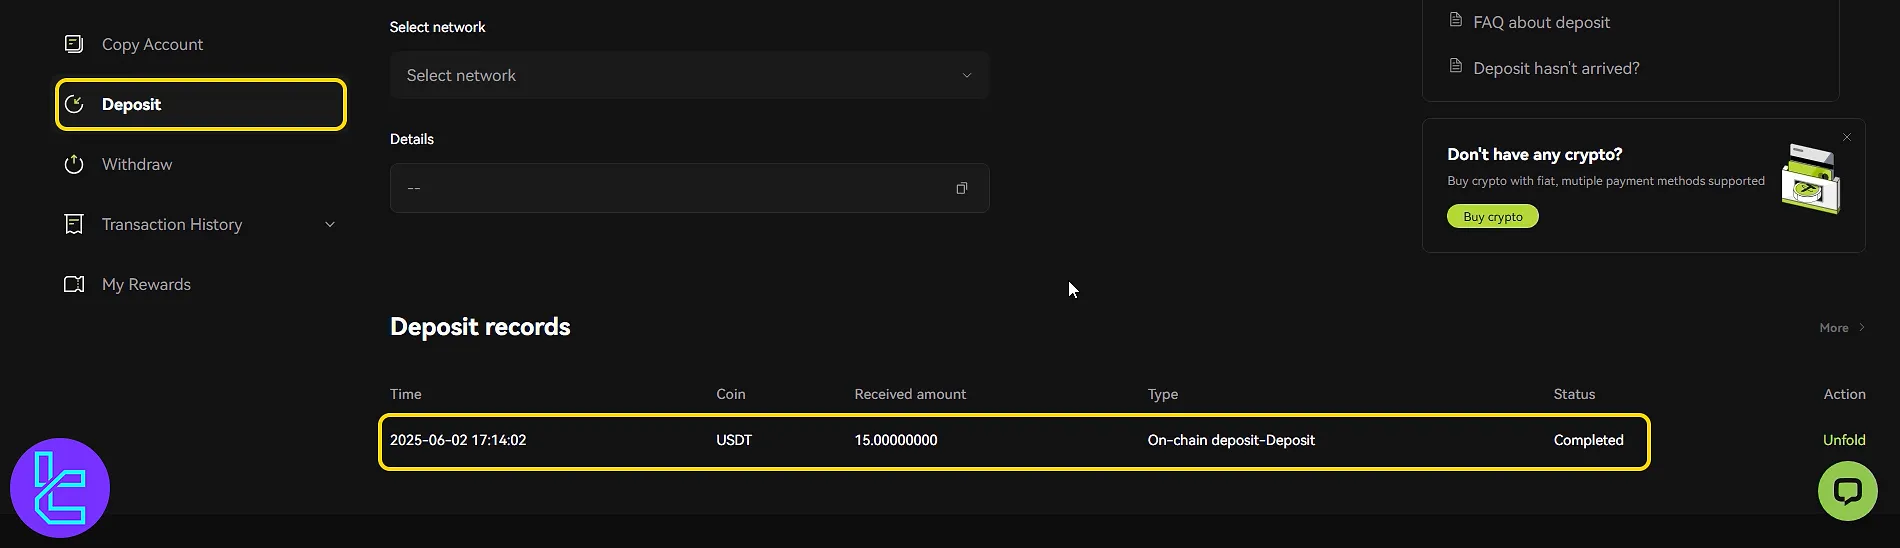
#3 View Transaction History
The amount will appear in your balance shortly. Scroll down in the "Deposit" section to find your transaction history.
TF Expert Suggestion
A Bitunix TRC20 deposit takes around 10 minutes and provides a fast, efficient way to transfer USDT on the Tron network to your crypto account.
For additional funding options, you can use the Bitunix ERC20 deposit method. A comprehensive guide is available on the Bitunix tutorial page.