


OQtima ERC20 deposit is an easy 4-step funding process Choose USDT (ERC20) as your funding option, enter the amount (minimum $20) to transfer, and select the ERC20 network. Then copy the generated ERC20 wallet address or scan the QR code to initiate the transfer.
OQtima ERC20 Deposit Process
Adding funds to your OQtima broker account using Tether (USDT) on the Ethereum (ERC20) network is straightforward and beginner-friendly.
OQtima ERC20 deposit overview:
- Enter the “Deposit Funds” section and choose USDT payment method;
- Complete the funding details, including amount and ERC-20 network;
- Copy the ERC20 address or scan the QR code to transfer the funds;
- Review funding information on the "Transaction Report".
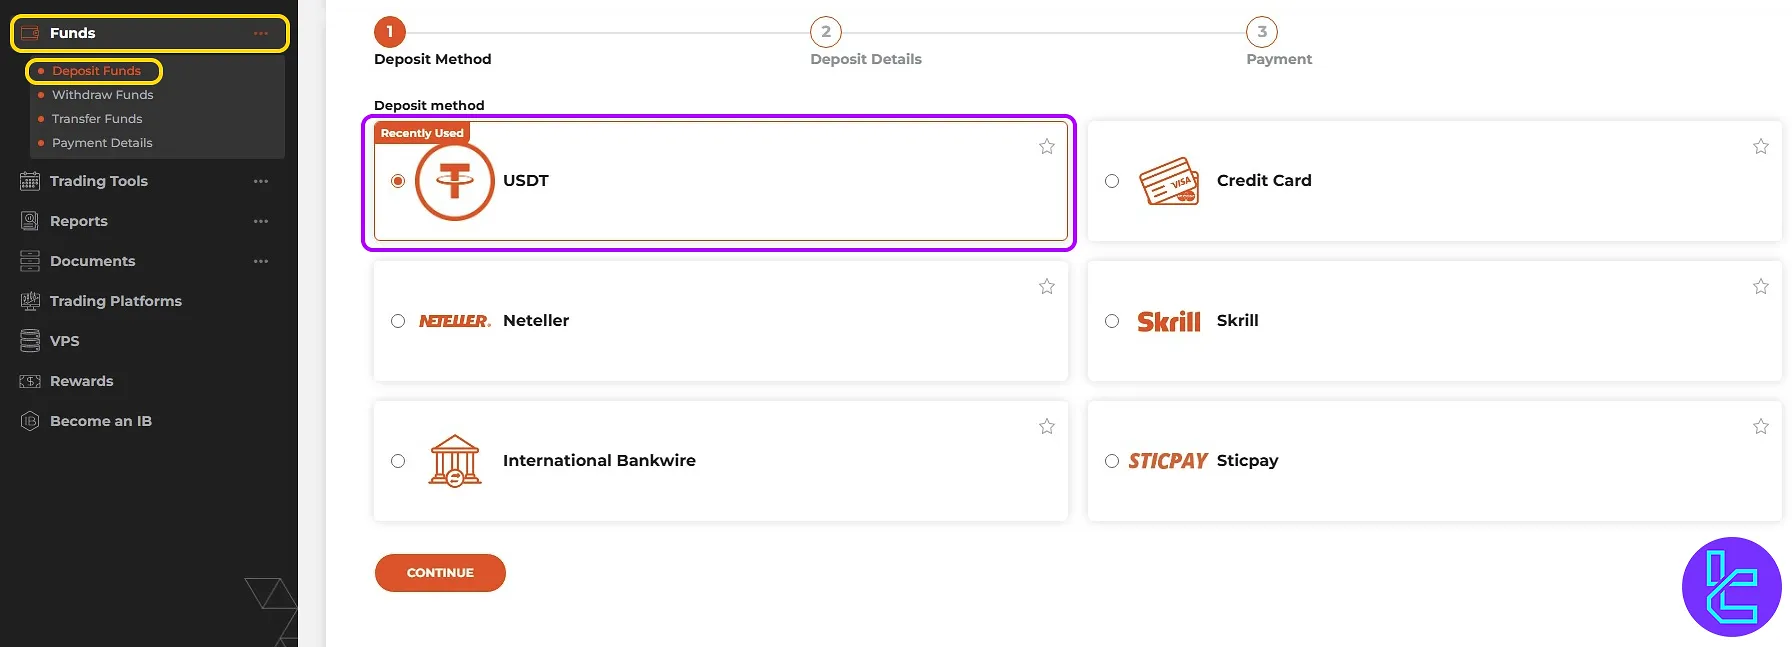
#1 Access "Deposit Fund" and Select USDT
To begin the funding process, follow these steps:
- Log in to your OQtima dashboard;
- Navigate to the "Fund" section from the left sidebar, and select "Deposit Fund";
- From the list of available options, choose USDT as your funding currency and click "Continue" to proceed.
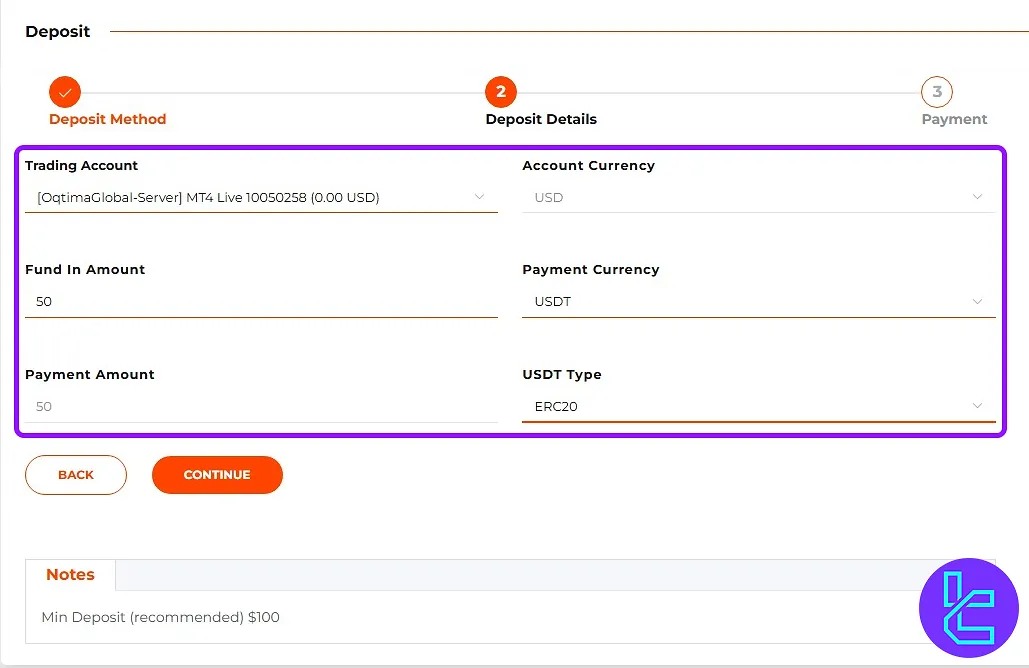
#2 Enter Account and Amount Details
Choose the trading account you wish to fund. Input your desired funding amount (minimum $20) and select ERC20 as the network type. Then, click "Continue".
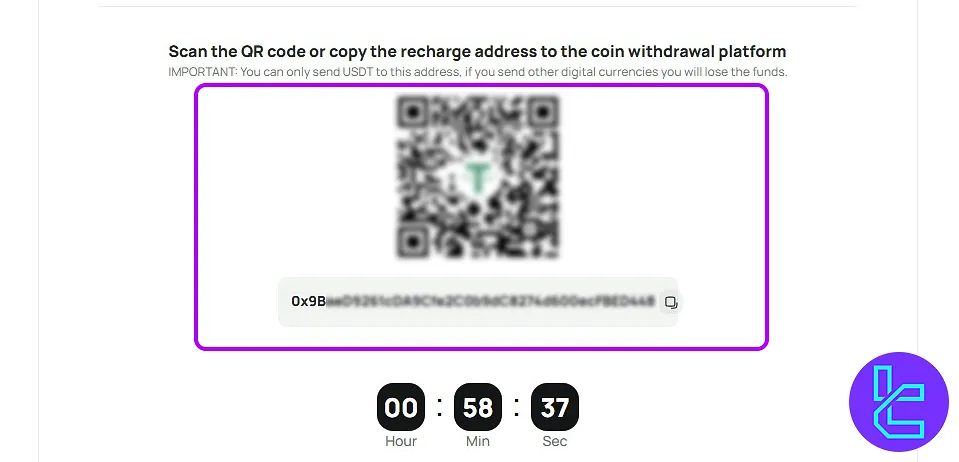
#3 Copy Wallet Address or Scan QR Code
You will receive a unique ERC20 wallet address and the exact amount to send. Copy it manually or scan the QR code for convenience and accuracy. Send the funds from your personal wallet to the destination address.
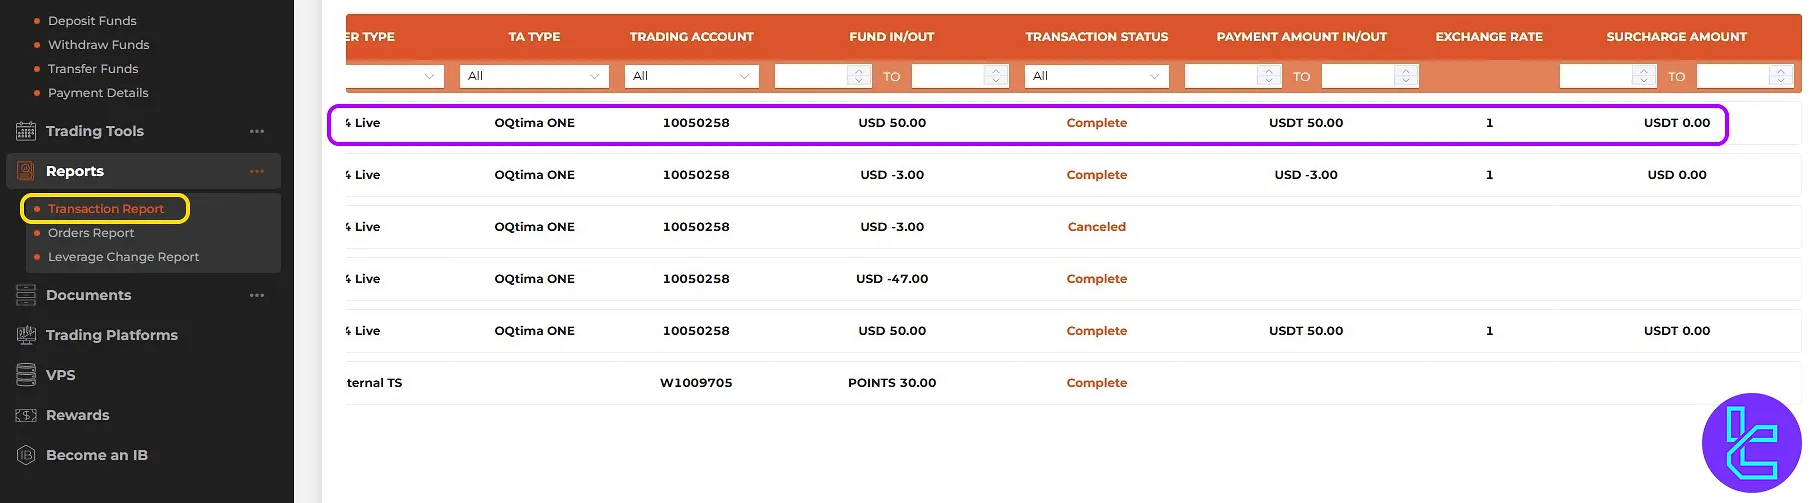
#4 View the Transfer Fund Status in Your OQtima Account
Return to OQtima’s main cabin, navigate to "Report" and then "Transaction Report" to verify the funding details.
TF Expert Suggestion
The OQtima ERC20 deposit process takes 10 to 60 minutes, depending on network confirmations (12 confirmations required). Be sure to select ERC20 as the chain type and ensure the actual credited amount excludes transfer fees, as insufficient transfer funds may not be accepted.
For reduced transaction fees, consider using the other OQtima deposit and withdrawal methods using the guides on the OQtima tutorial page.


