


Bitfinex Tether ERC20 deposit requires selecting USDT on ERC20, generating a wallet address under the “Funding” section, and transferring via your mobile wallet.
Key Steps for Bitfinex Tether ERC20 Funding
To transfer USDT ERC20 to the Bitfinex exchange, follow these 6 steps:
- Go to the wallet and click “Deposit”;
- Choose “USDT Tokens”;
- Select “Tether USDTonEthereum”;
- Generate a funding wallet address;
- Send Tether ERC20 from your wallet;
- Track funding status on Bitfinex.
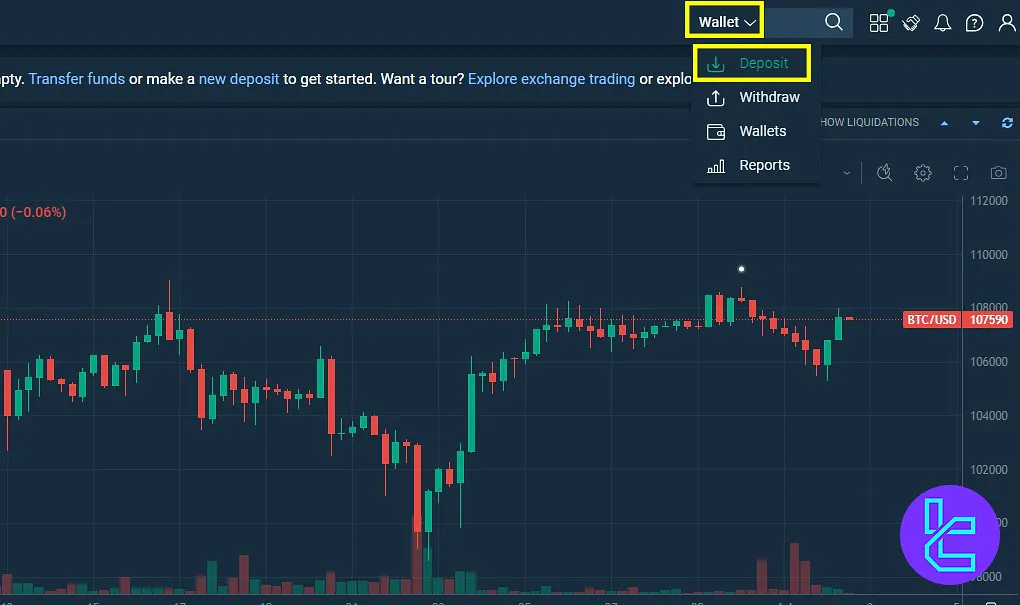
#1 Go to “Wallet” and Select “Deposit”
Start your Bitfinex Tether ERC20 payment from the wallet section:
- Navigate to the “Wallet” page;
- Click on the “Deposit” option.
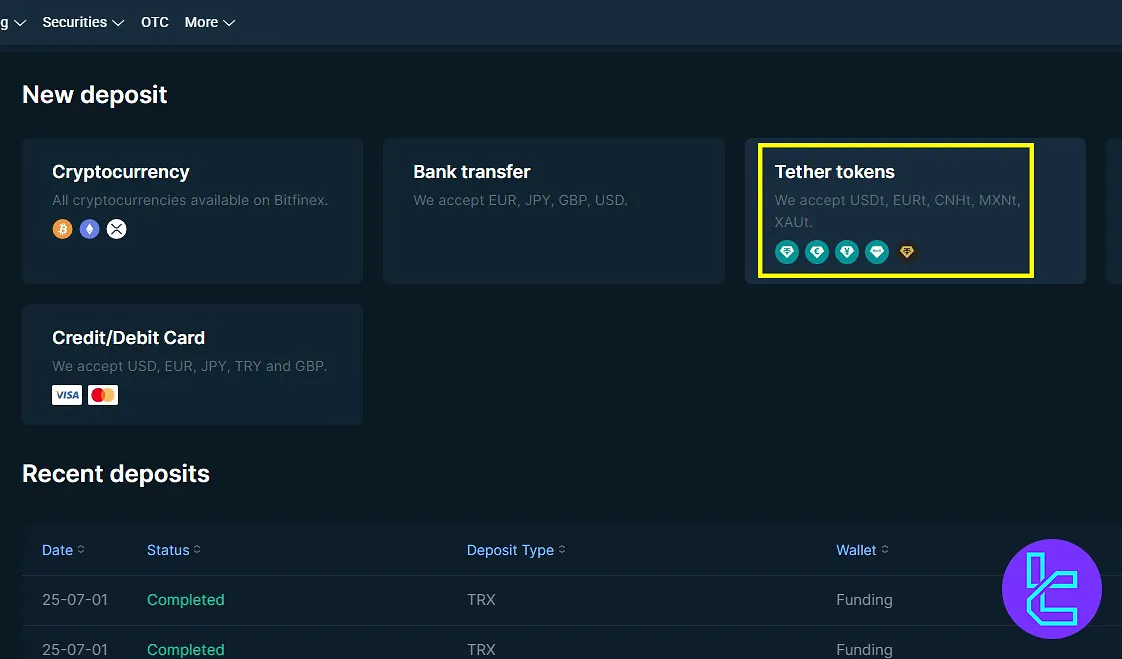
#2 Choose “USDT Tokens”
There are 3 types of cryptocurrency methods on the platform; make sure you select “Tether Tokens”.
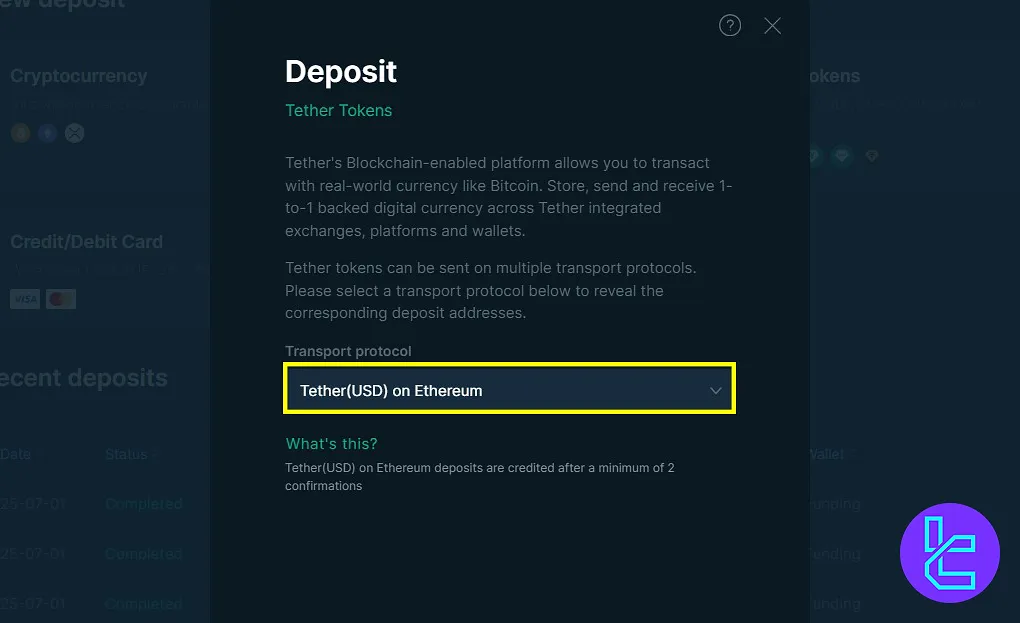
#3 Select the Network
From the drop-down menu, select Tether USDT on Ethereum blockchain network, then click “Continue”.
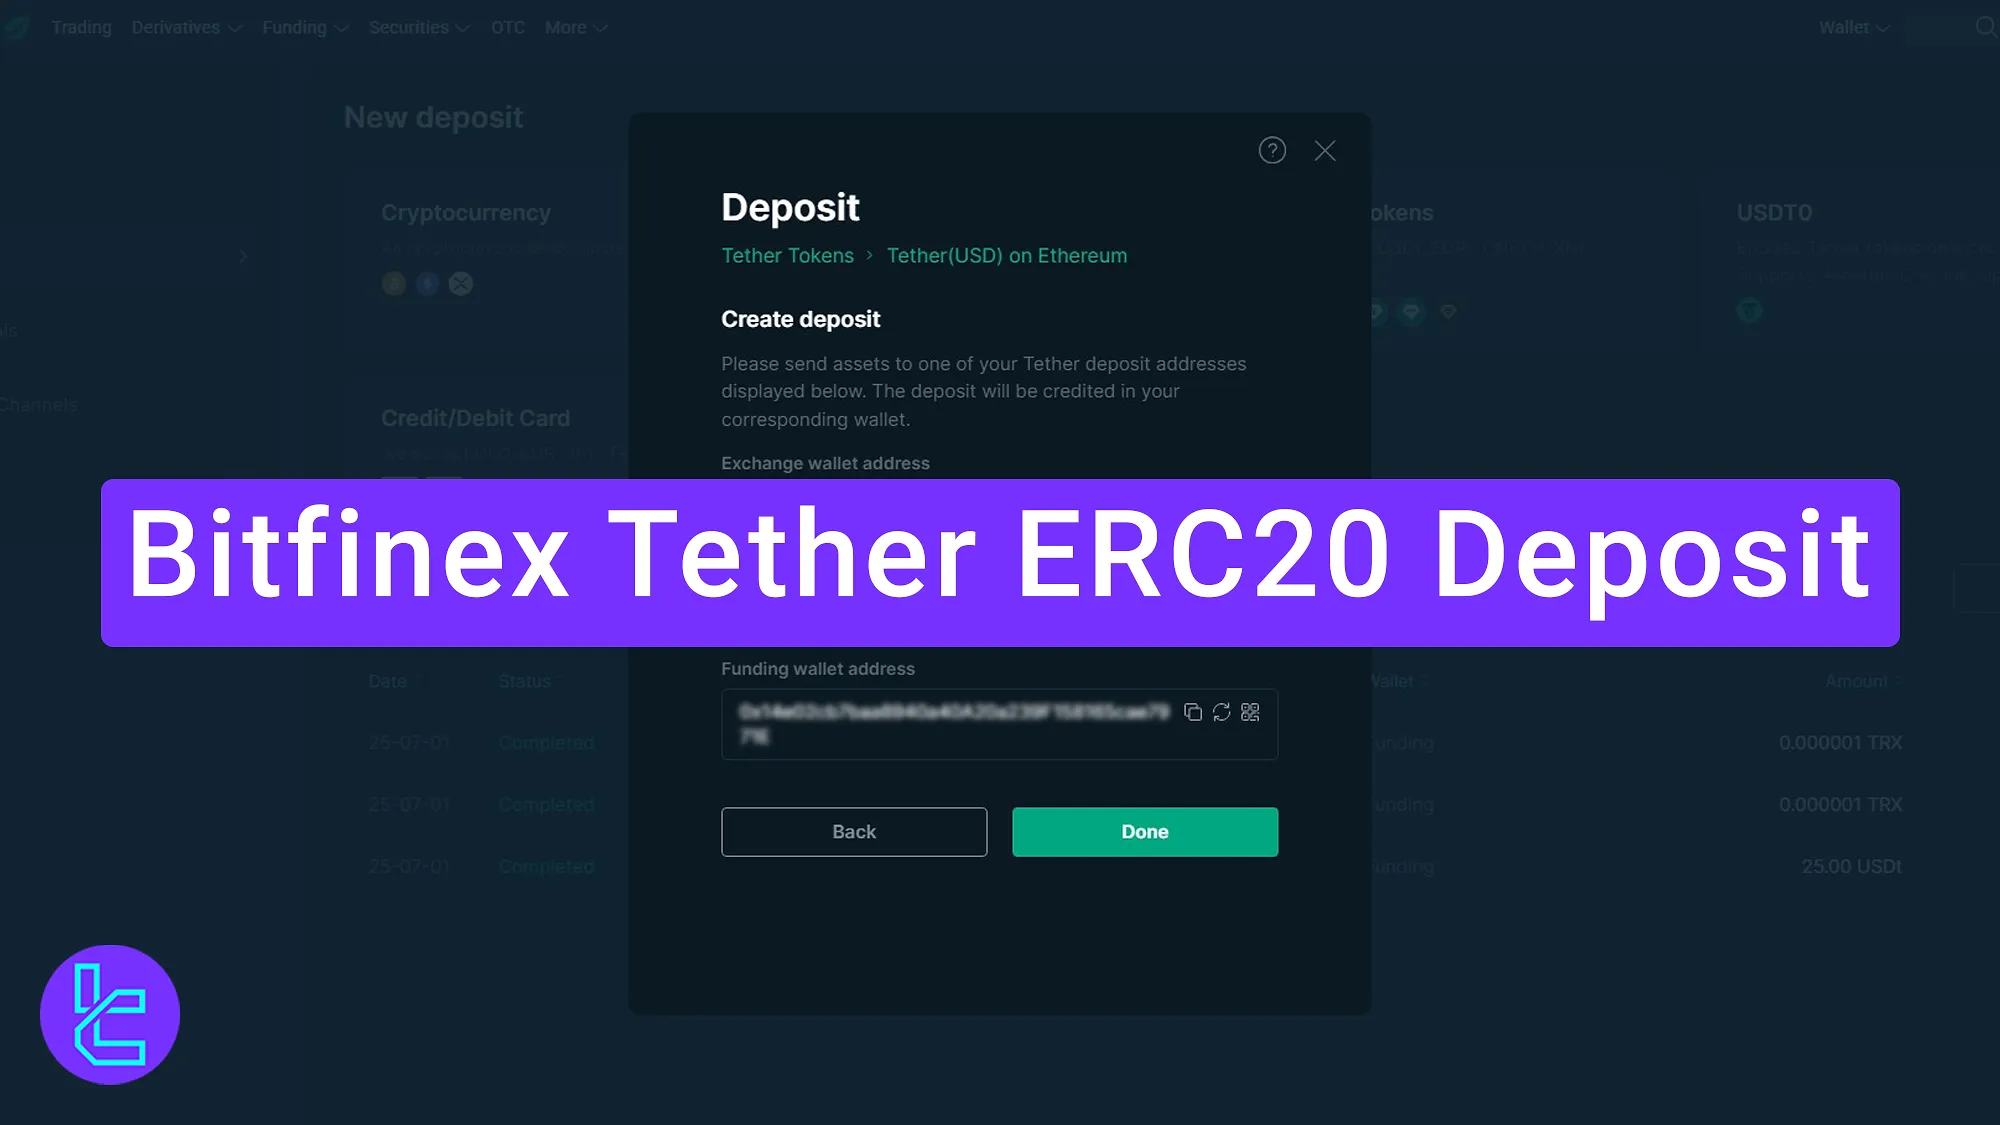
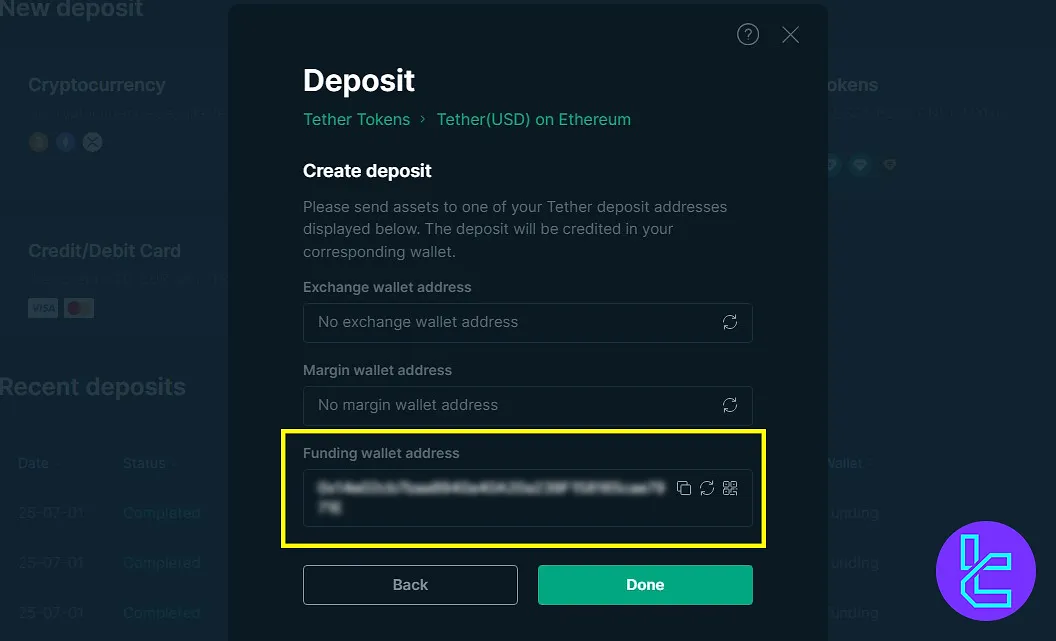
#4 Use the Funding Section
Generate the wallet for your transfer; to do so:
- Choose “Funding wallet address” from wallet types;
- Click the refresh button to generate the address;
- Copy the generated address.
#5 Send USDT from Your Wallet
Use your mobile wallet to complete the payment:
- Paste destination address or scan QR;
- Enter the desired amount;
- Click “Send” to proceed;
- Finalize your payment by confirming the transfer;
- Check sender/recipient address and fee;
- Click Confirm and enter the password.
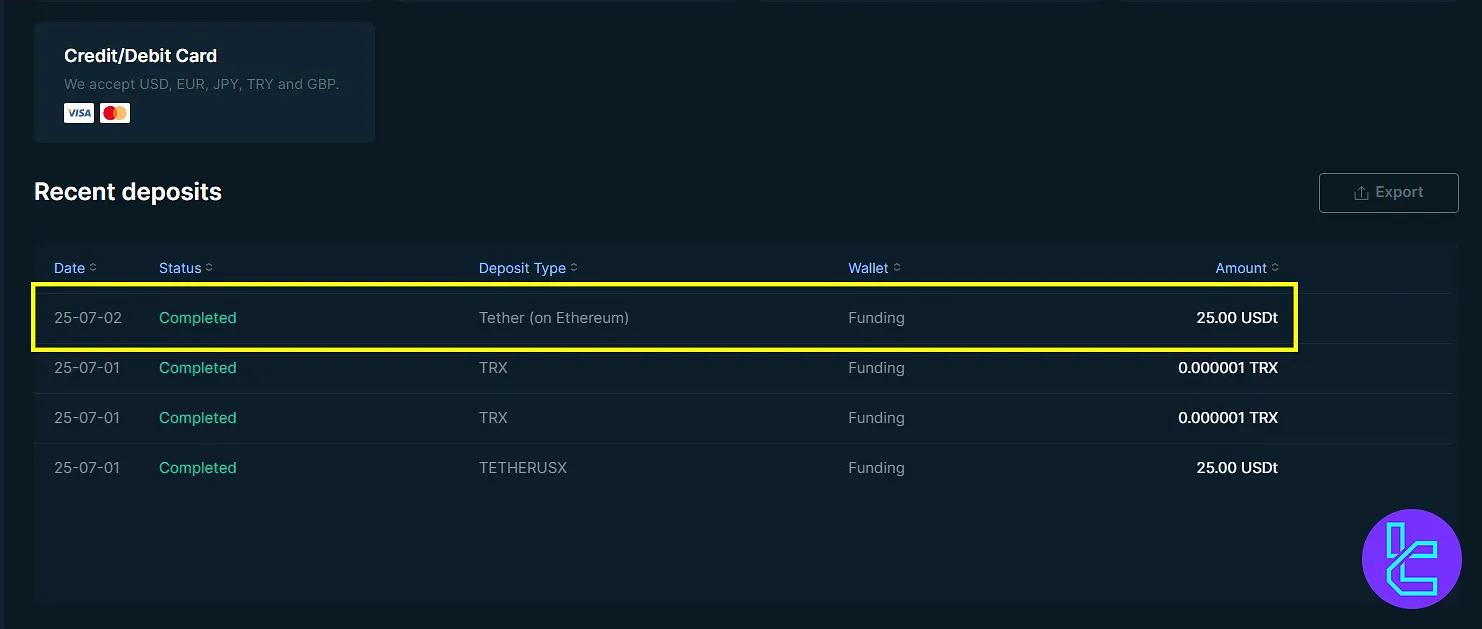
#6 Track Your Deposit Status
To review your transaction on Bitfinex, go back and click “Done” to see your transaction status, or go to the “Balance” section to see the funds reflected.
Conclusion and Final Words
Bitfinex Tether ERC20 deposit is now completed in 2 minutes. You can check your funding details either in the “Balance” or “Deposit” section. Always make sure you generate a new ERC-20 wallet address for new transaction.
For faster transactions, read the Bitfinex Tether TRC20 deposit from the most recent guides on the Bitfinex tutorials page.


