


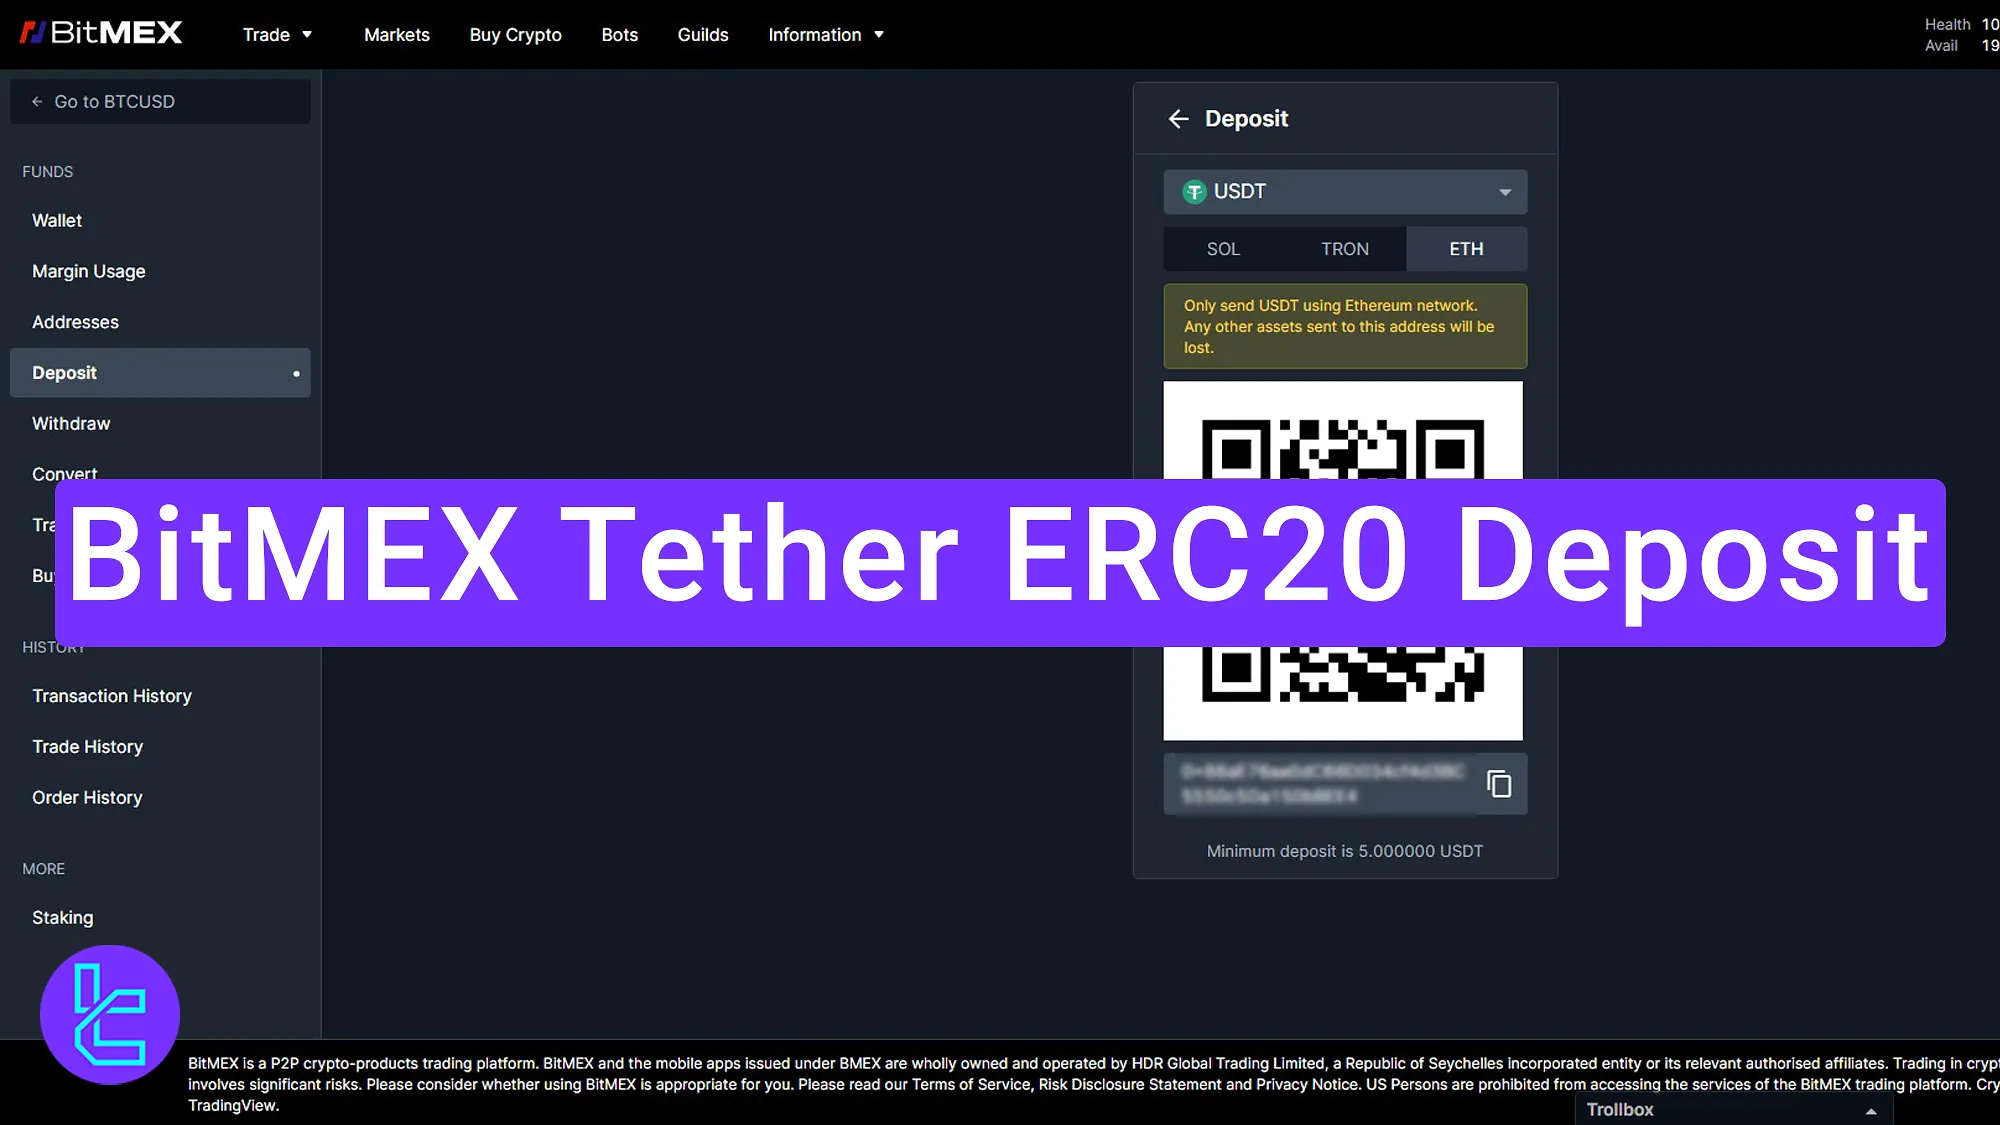
BitMEX Tether ERC20 deposit is simple and takes just 3 minutes. Access the “Funds” section, select USDT and ERC-20 blockchain network, scan the QR code and transfer the funds from your personal wallet.
BitMEX Tether ERC20 Transaction Key Steps
To transfer USDT (ERC20) to BitMEX exchange, you should follow a beginner-friendly procedure outlined below. BitMEX Tether ERC20 deposit process:
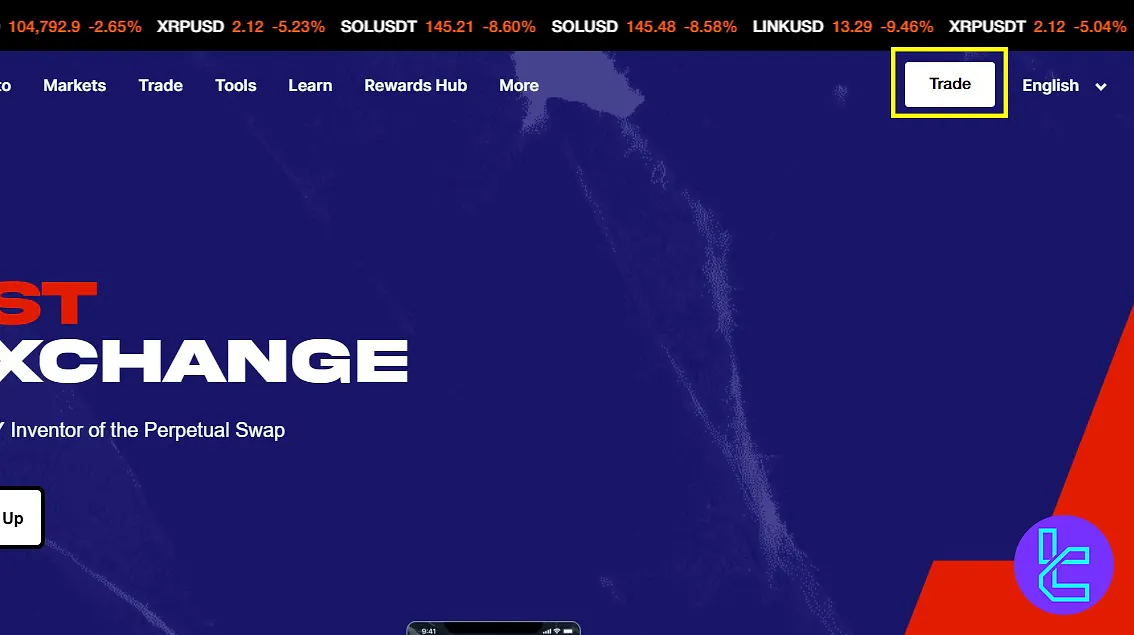
- Click on Trade, then go to “Funds”;
- Select USDT and Set the network to Ethereum (ERC-20);
- Copy or scan the displayed destination address;
- Go to your wallet and initiate the payment;
- Enter address and amount and confirm the transaction status.
Before starting the process, make sure you’ve completed BitMEX verification.
#1 Click on Trade and Go to Assets
login to your dashboard and click “Trade”.
#2 Choose USDT and ERC-20 on BitMEX
Go to the funds section from the new page and click “Deposit”. after that complete the following steps:
- Set token to USDT;
- Switch network to Ethereum.
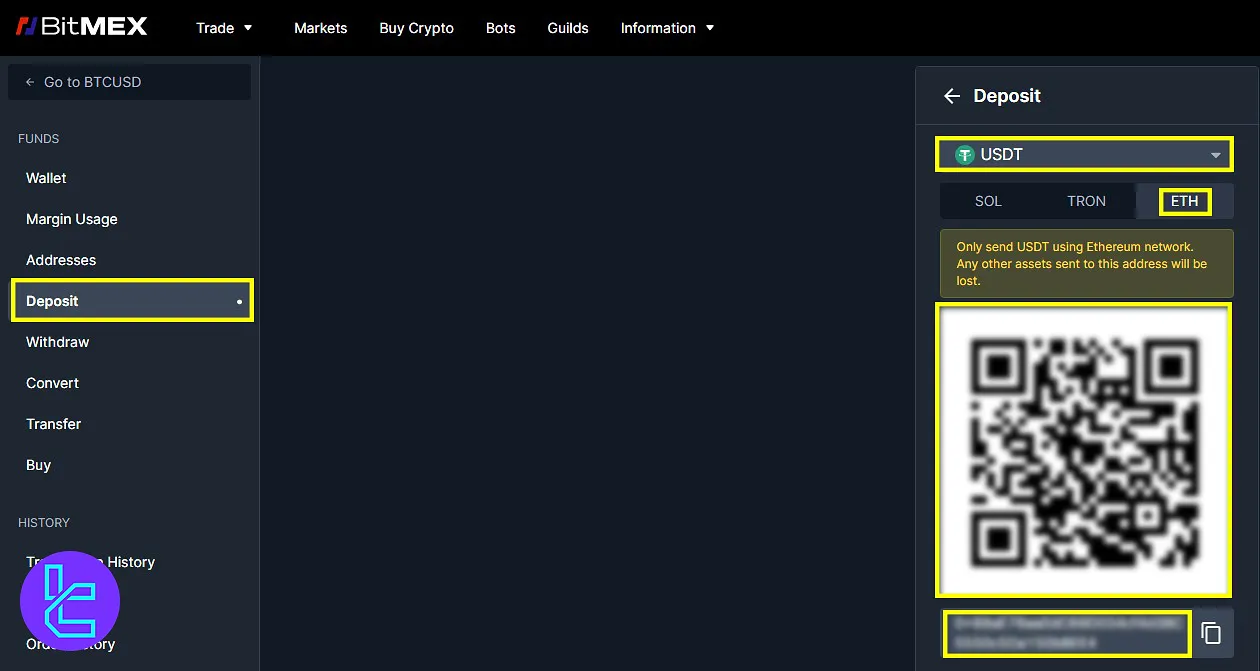
#3 Copy or Scan Destination Address Shown on BitMEX
Copy the displayed address or scan the QR code to send funds from your personal wallet. Make sure to double-check the address to avoid any transfer errors.
#4 Open Wallet and Select Network to Deposit to BitMEX
Open your wallet app, choose USDT and Ethereum (ERC-20) and tap “Send”.
#5 Enter Details and Confirm the BitMEX Deposit
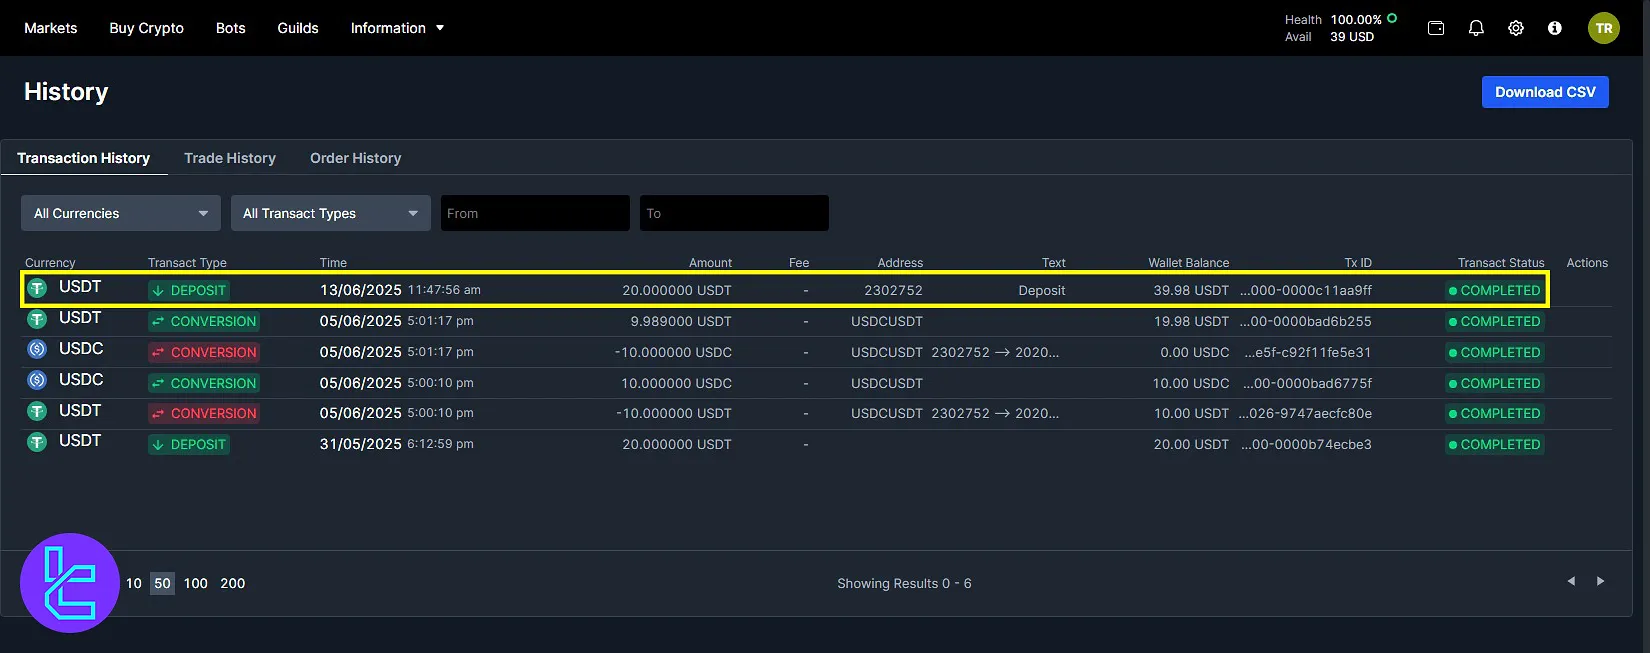
Paste the destination address, enter the amount (min 5 USDT), to finalize the process. on the BitMEX dashboard, click on “More Detail” to view the transaction on Etherscan. You can also visit the “History” section on BitMEX to check the status.
Final Words and Conclusion
BitMEX Tether ERC20 deposit is now completed in 5 steps with a minimum of $5. If you send from other networks to the ERC20 address, your funds will be lost. Always check the “History” section to ensure that amount has been added to your account successfully.
For faster alternatives, read BitMEX Tether TRC20 deposit from the guides on the BitMEX tutorial page.


