


Bitunix BTC deposit process takes just 2 minutes to complete. The process includes selecting BTC, copying the wallet address, entering the amount, scanning the QR code.
Key Steps for Bitunix BTC Funding
To charge Bitunix exchange using Bitcoin, carefully follow these 4 steps; Bitunix BTC funding process:
- Click on “Deposit” option;
- Select Bitcoin and BTC blockchain network;
- Send Bitcoin from your wallet;
- Confirm transaction and track funding in history.
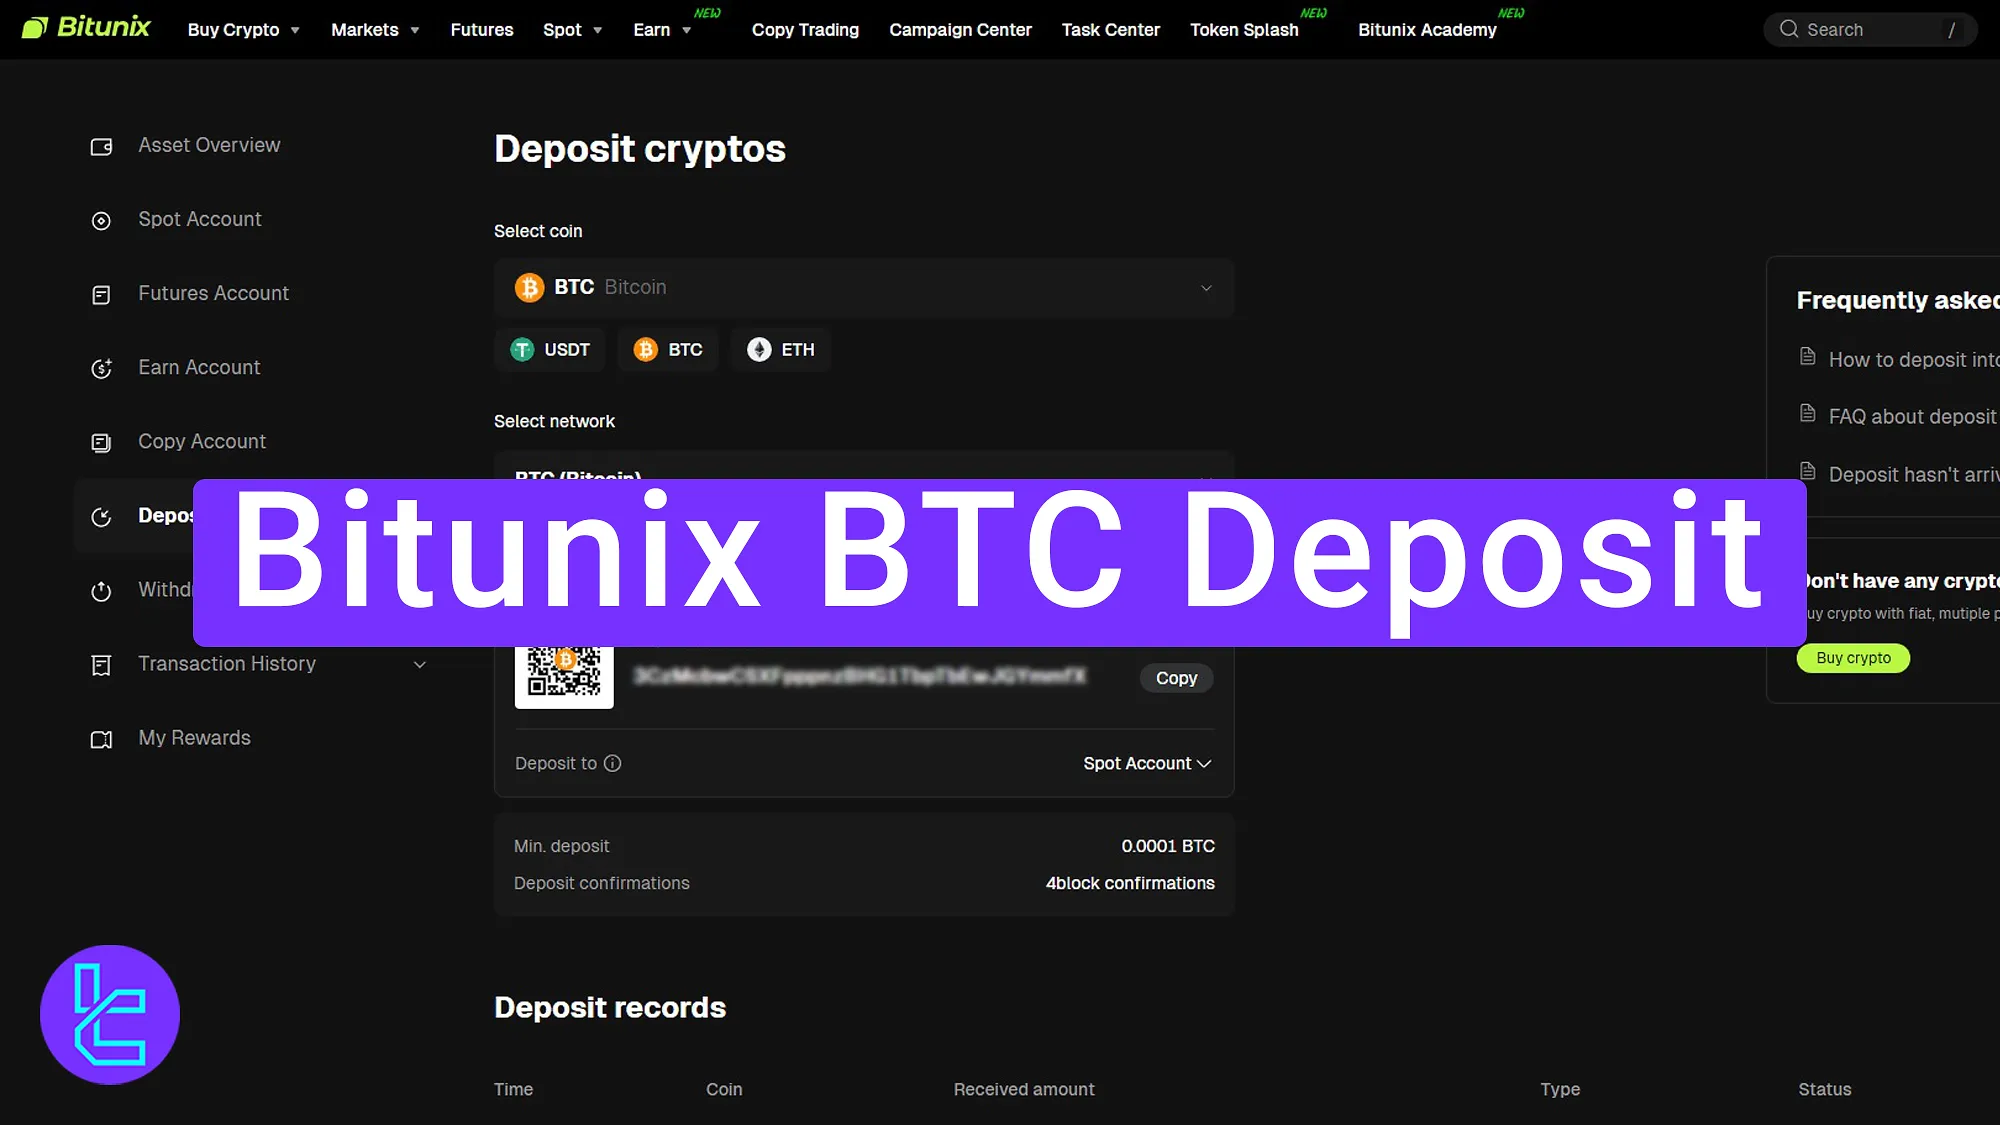
#1 Select Deposit Option on Bitunix
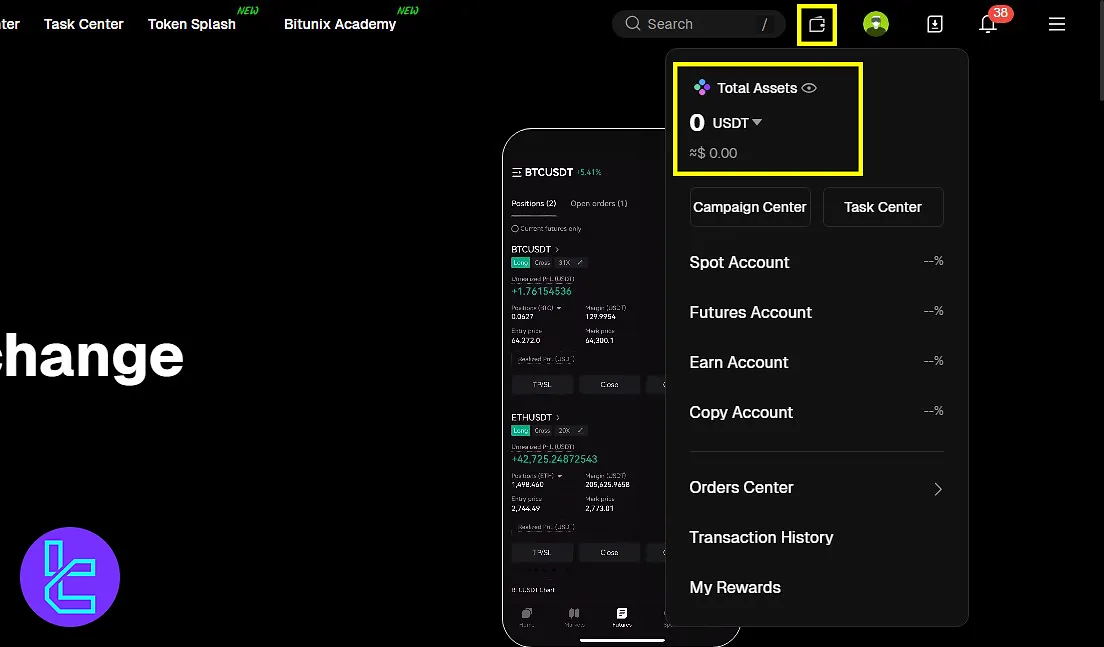
Begin the BTC funding by going to the wallet icon on the main dashboard, selecting “Assets”, then clicking “Deposit” to proceed.
#2 Choose Bitcoin and Network in Bitunix
Pick “Bitcoin” from the coin list, use the Bitcoin network, and view the minimum payment requirement (0.0001 BTC) in this cryptocurrency exchnage.
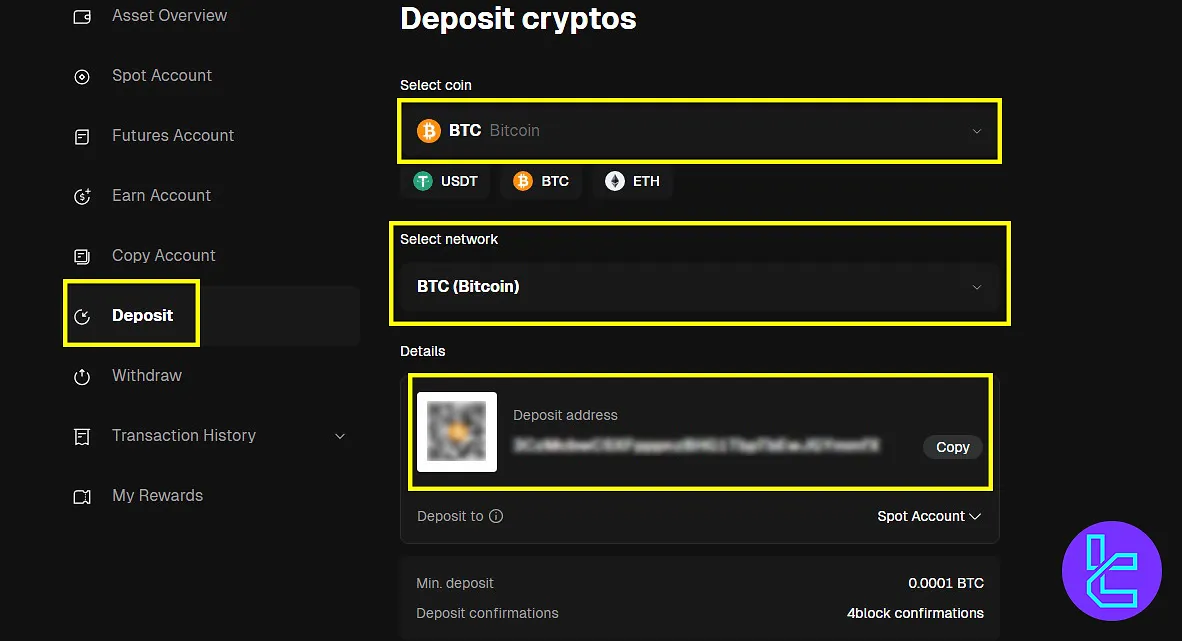
#3 Send BTC to Bitunix Using Wallet
Open your mobile wallet and send BTC to the displayed address:
- Paste the copied address or scan the QR;
- Enter the desired amount to deposit;
- Click “Send”.
Verify the transaction information before proceeding:
- Sender and recipient address;
- Network fee and total amount.
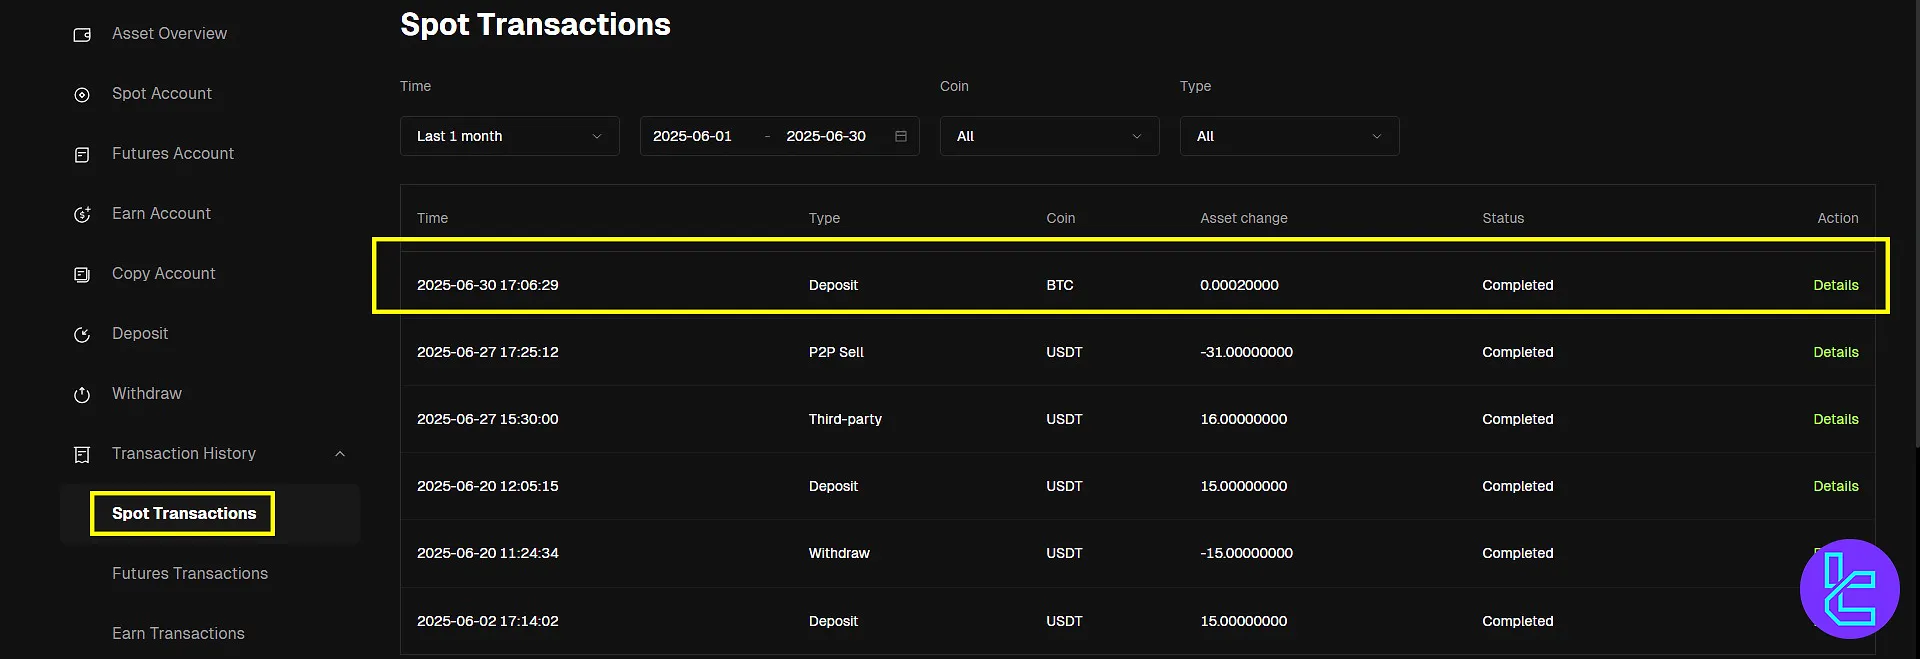
#4 View Deposit Confirmation and Bitunix History
Check your deposit status after confirmation. Wait for 4 block confirmations, then return to Bitunix to see your balance. Access transaction records for full transparency:
- From left side menu, go to “Transaction History” and “Spot Transactions”;
- View all BTC funding details, including network, fees, etc.
Conclusion and Final Words
Bitunix BTC deposit is now completed in 4 steps. Note that the process requires 4 block confirmations. Always review the final transaction in the history section.
To see how to get funds out of your account, read the Bitunix BTC withdrawals from the recent articles on the Bitunix tutorials page.


