


Bitunix copy trading is a fast 4-Step way to follow professional traders and earn passive income without trading skills.
The process includes accessing the copy trading section, choosing a trader, and setting up copy preferences in just a few minutes. A 10% commission applies, and custom options like fixed or multiplier mode are available.
Bitunix Copy Trading Activation Process
After completing the Bitunix verification, all financial features, including social trading, will become available on the Bitunix exchange dashboard. Bitunix copy trading activation steps:
- Entering the "Copy Trading" section;
- Exploring dashboard tools;
- Selecting a copy trader account;
- Customizing settings and managing your copy portfolio.
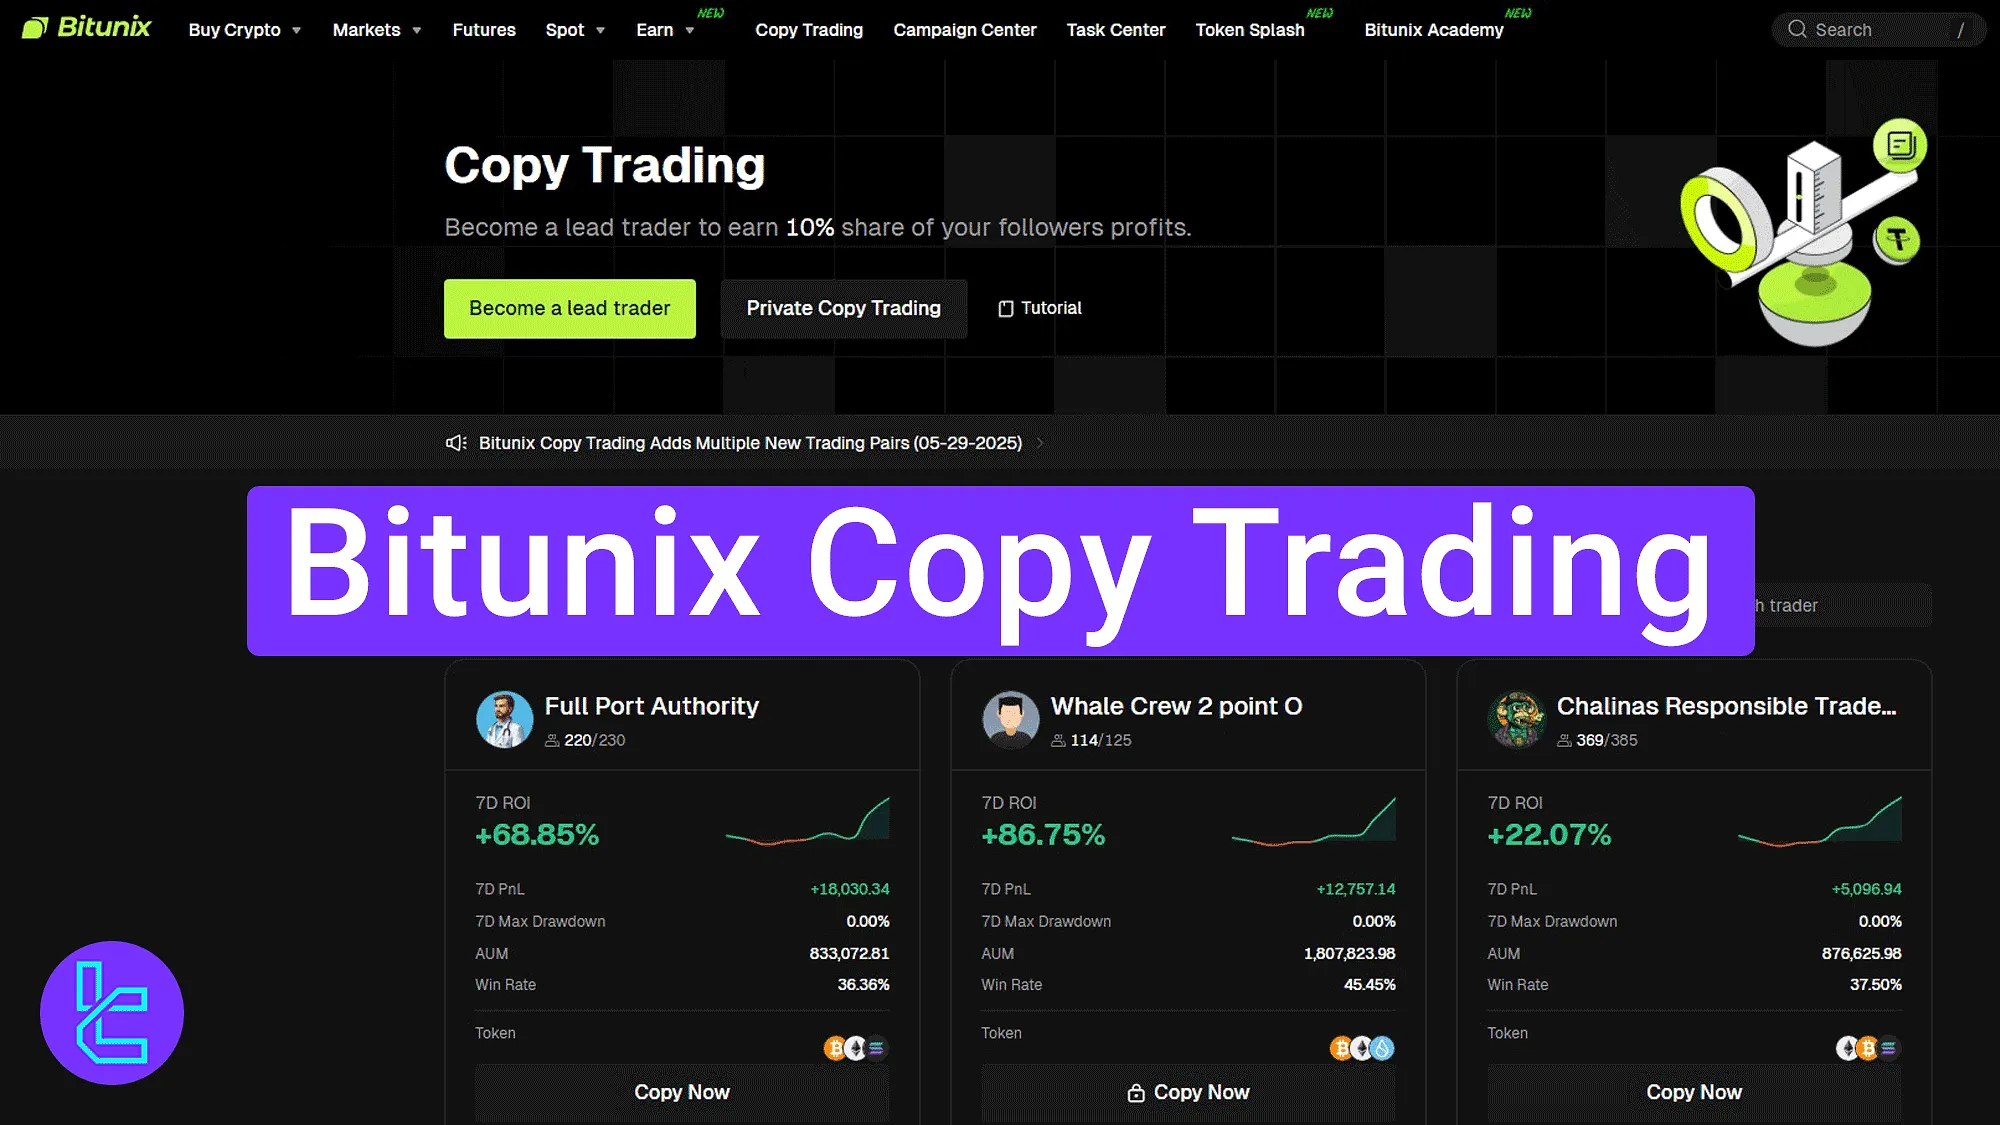
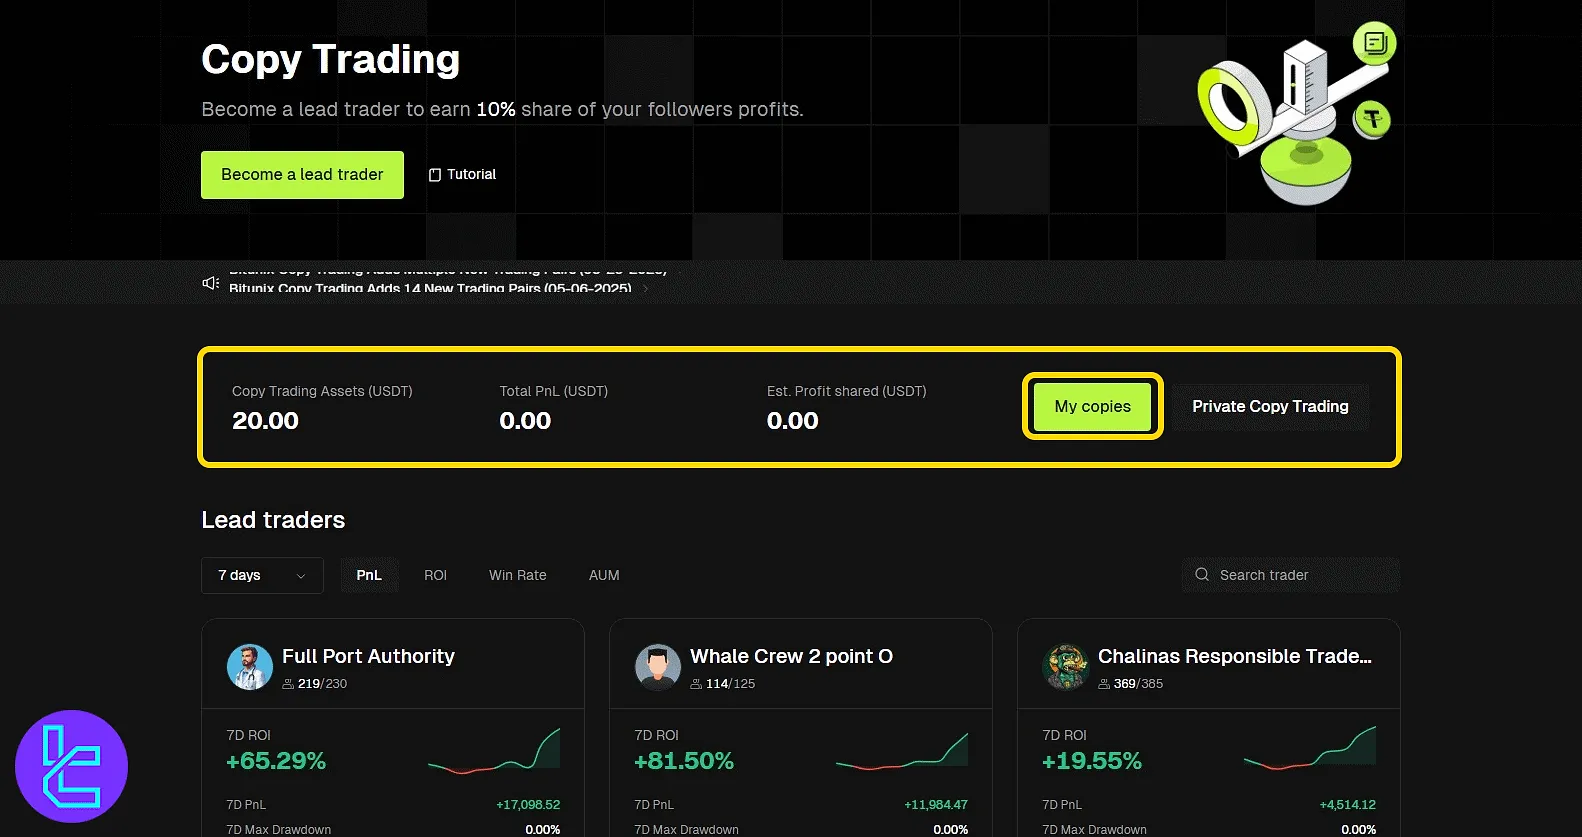
#1 Entering the Copy Trading Section
Click on the "Copy Trading" button from the top navigation bar of the cryptocurrency exchange homepage.

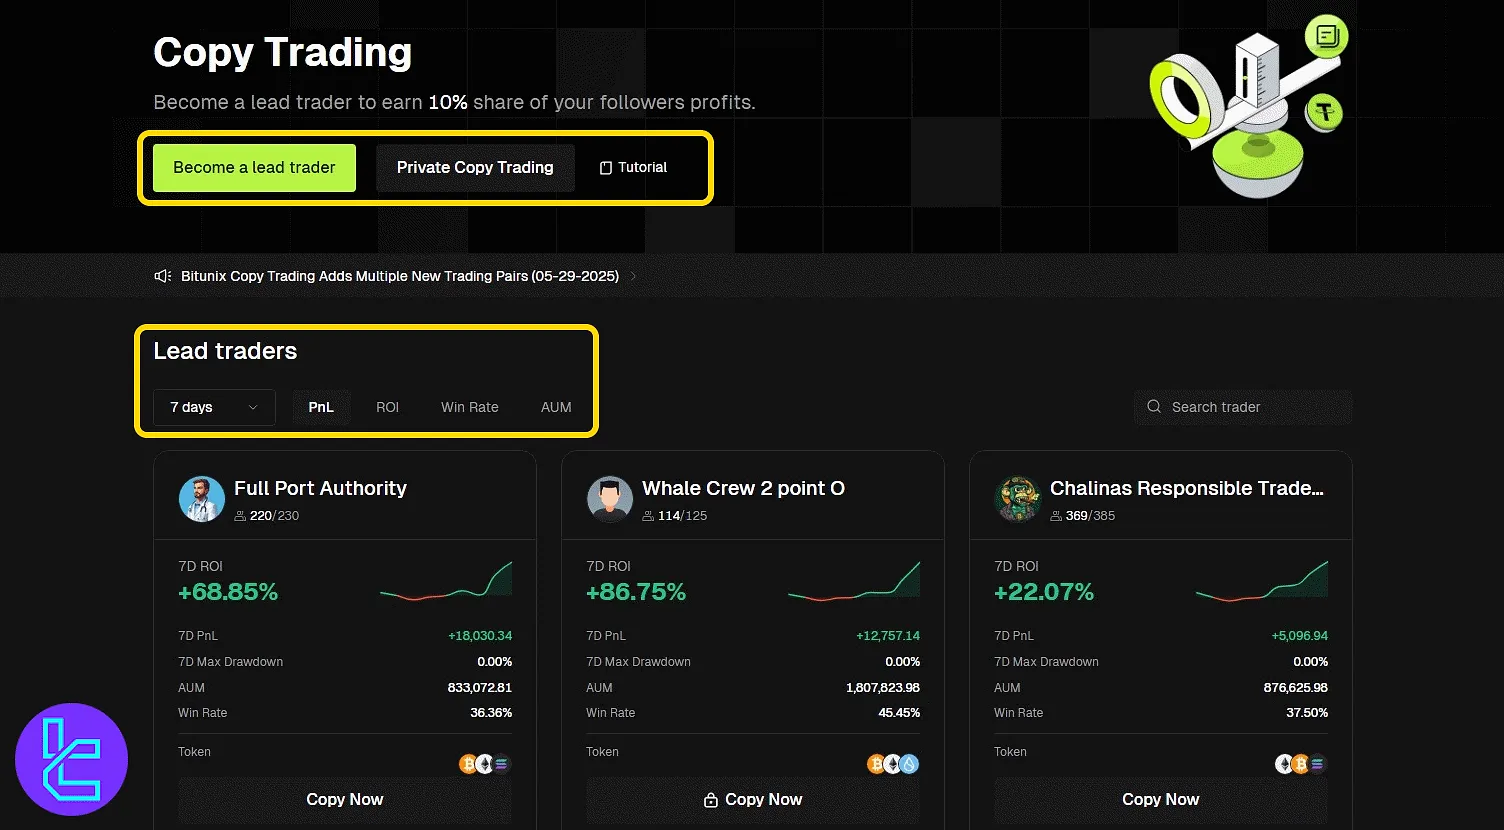
#2 Exploring Dashboard Tools and Lead Trader Setup
The main dashboard includes a full list of traders, category filters, and a search bar to find specific trader profiles.
There are also shortcuts to:
- Become a Lead Trader: Apply to register as a strategy provider and allow others to copy your trades.
- Private Copy Trading: Create a closed environment for select individuals to copy your trades under private access.
- Tutorial: Access a library of general guides that explain how the Bitunix copy trading system works, including roles, fees, and setup steps.
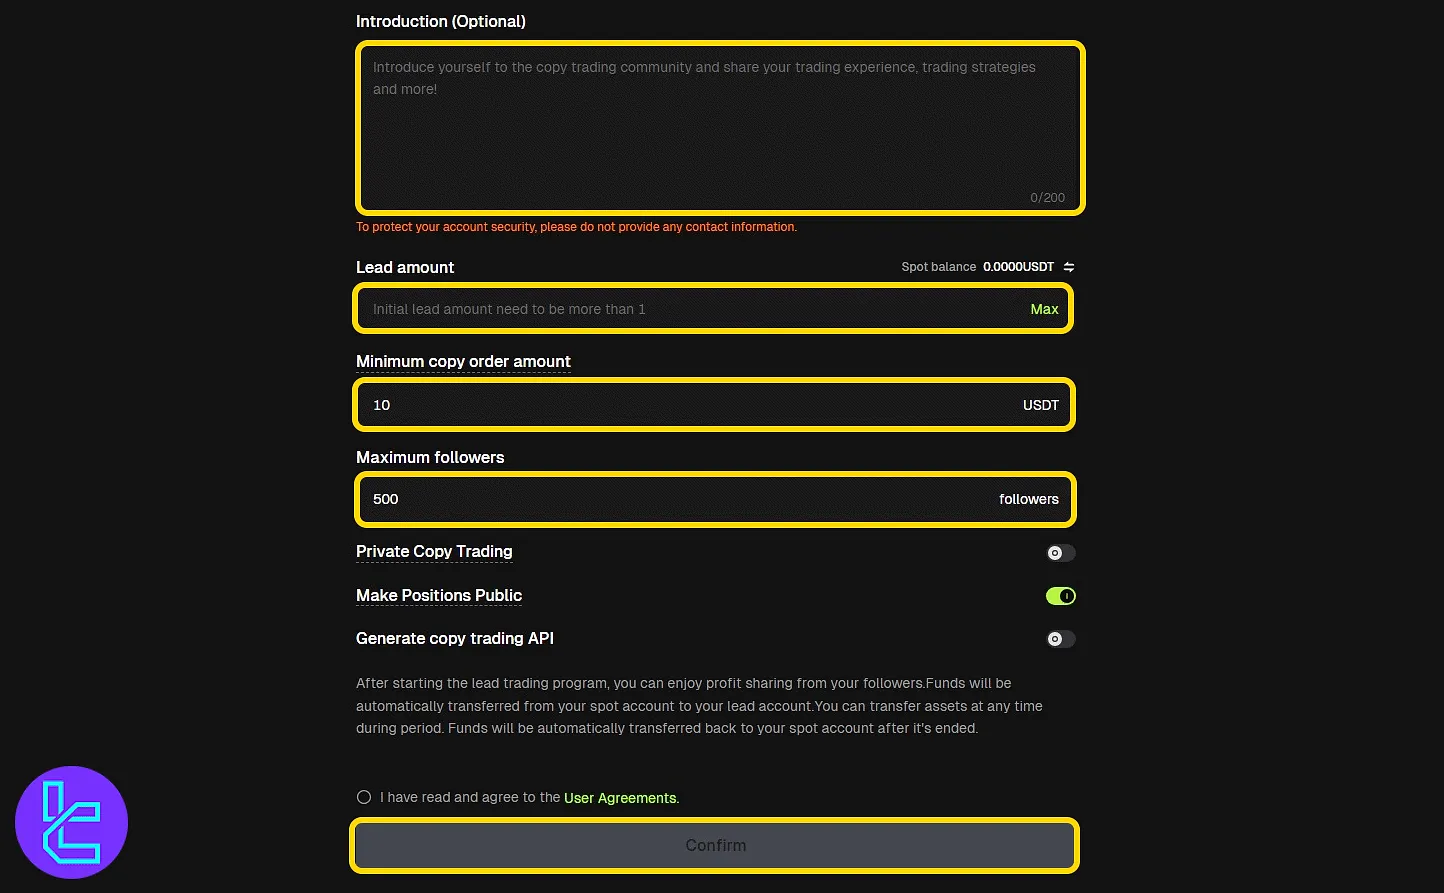
Clicking on "Become a Lead Trader" takes you to a registration form. Fill out the following to sign up as a provider:
- Your own trading capital amount;
- Minimum copy amount others must follow;
- Max number of followers allowed;
- Enable or disable private mode, public positions, or API.
Finally, accept the terms and click "Confirm".
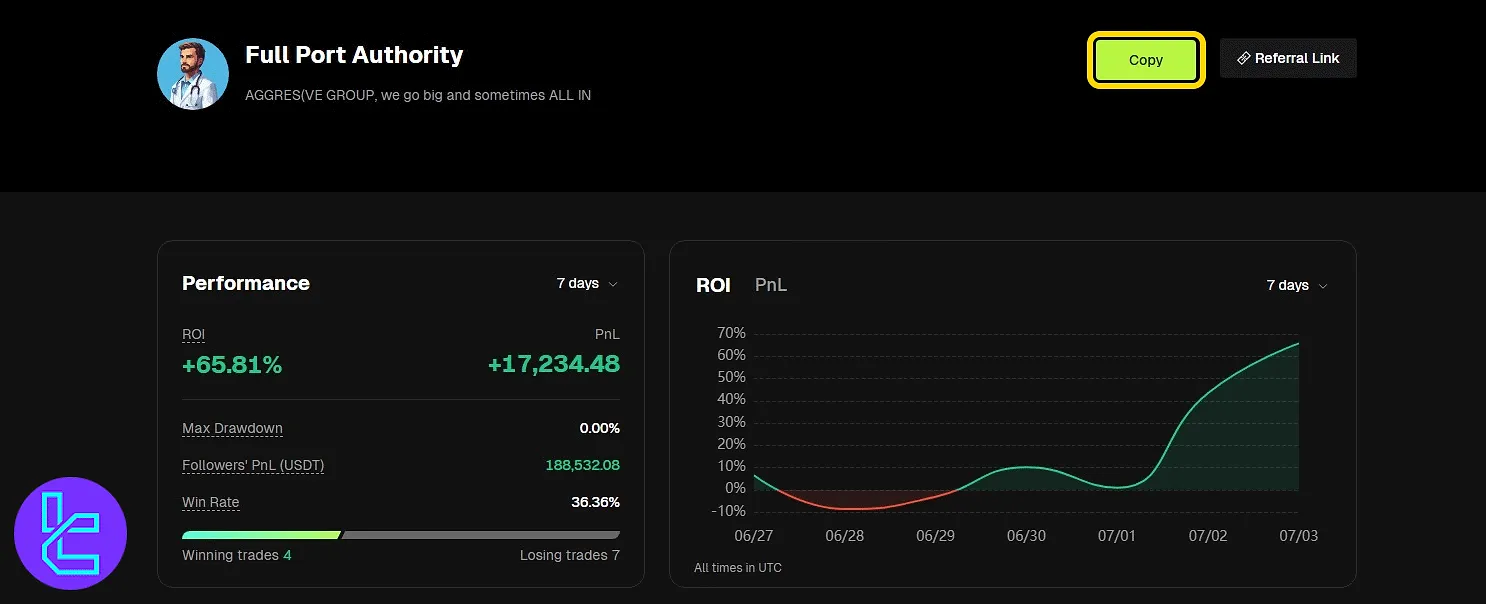
#3 Selecting a Copy Trader Account
Use filters to compare traders by performance, drawdown, or asset type. Each trader card shows:
- Username
- Current and allowed followers
- ROI chart (7 days)
- Drawdown, AUM, win rate
- Traded coins/tokens

Clicking a trader's name opens their detailed profile page.
It Includes:
- ROI, PnL, win/loss count;
- AUM, margin balance, follower stats;
- Asset list, trade history, and current positions.
Users can press the "Copy" button to start the process.
#4 Customizing Settings and Managing the Copy Process
In "Multiplier" mode, users must specify the total capital they wish to allocate for copying, along with a stop-loss threshold to limit potential losses.
Optional fields include selecting the margin mode, choosing whether to match the trader’s leverage or use fixed leverage, and configuring slippage settings. Once these values are entered, agree to the terms and click the "Copy" button to begin.

In "Fixed amount" mode, users must specify how much capital to allocate per trade and the total amount they wish to use for copy trading. A stop-loss level must also be defined to limit potential losses.
Advanced options, if available, can be configured for finer control. Once all values are entered and settings reviewed, agree to the terms and click the "Copy" button to activate.

After copying, a new section appears in your dashboard that displays your allocated copy capital, live profit or loss, and the calculated 10% profit share owed to the trader. You can click "My Copies" for more details.
This panel allows you to monitor and manage all aspects of your copy trading activity in one place.
It includes:
- Margin balance;
- Total copy balance;
- PnL and unrealized PnL;
- Active and ended copy history;
- Follower activity and stats;
- Details for open orders, profit/funding history, transfer, and cancel options.

TF Expert Suggestion
The Bitunix copy trading setup process takes less than 10 minutes from start to finish, and users must first complete KYC.
They can either become a lead trader by submitting capital amount, limits, and access rules, or start copying others by choosing a trader and entering basic risk parameters.
To handle funds within your social trading account, it’s important to understand Bitunix deposit and withdrawal methods. For full visual instructions, refer to the Bitunix tutorial section.


