


Gemini exchange registration involves 4 steps, where you'll need to provide details such as your email address, password, country of residence, and preferred language.
After that, you'll be asked to confirm your email and enable two-factor authentication (2FA) for added security.
After completing sign-up, you have access to trade in more than 70 cryptocurrencies.
On the standard interface, Gemini applies a 1.49% trading fee plus 1% convenience fee, but switching to its ActiveTrader platform unlocks lower fees (makers can even pay 0%, and takers around 0.03–0.4%).
Gemini Exchange Account Setup Overview
Getting started on the Gemini exchange is straightforward and intuitive, granting you quick access to your customized trading dashboard. Gemini exchange registration process:
- Visit the official website;
- Provide your email address and create a secure password;
- Confirm your email using the 6-digit verification code;
- Set up a passkey or enable two-factor authentication (2FA) for added security.
Before creating an account, it's recommended to review the signup requirements and have all necessary details ready to ensure a seamless and efficient account opening experience with this cryptocurrency exchange.
Registration Requirements | Yes/No |
Email Sign-up | Yes |
Phone Number Required | No |
Google Account Login | No |
Apple ID Login | No |
Facebook Login | No |
Full Name | No |
Country of Residence | Yes |
Date of Birth | No |
Address Details | No |
Email Verification | Yes |
Phone Number Verification | No |
Financial Status Questionnaire | No |
Trading Experience Questionnaire | No |
#1 Open Gemini Exchange Signup page
To begin opening an account with this crypto exchange, follow these steps:
- Open your web browser, type Gemini exchange, and navigate to the official website;
- On the homepage, select "Get Started" to continue.

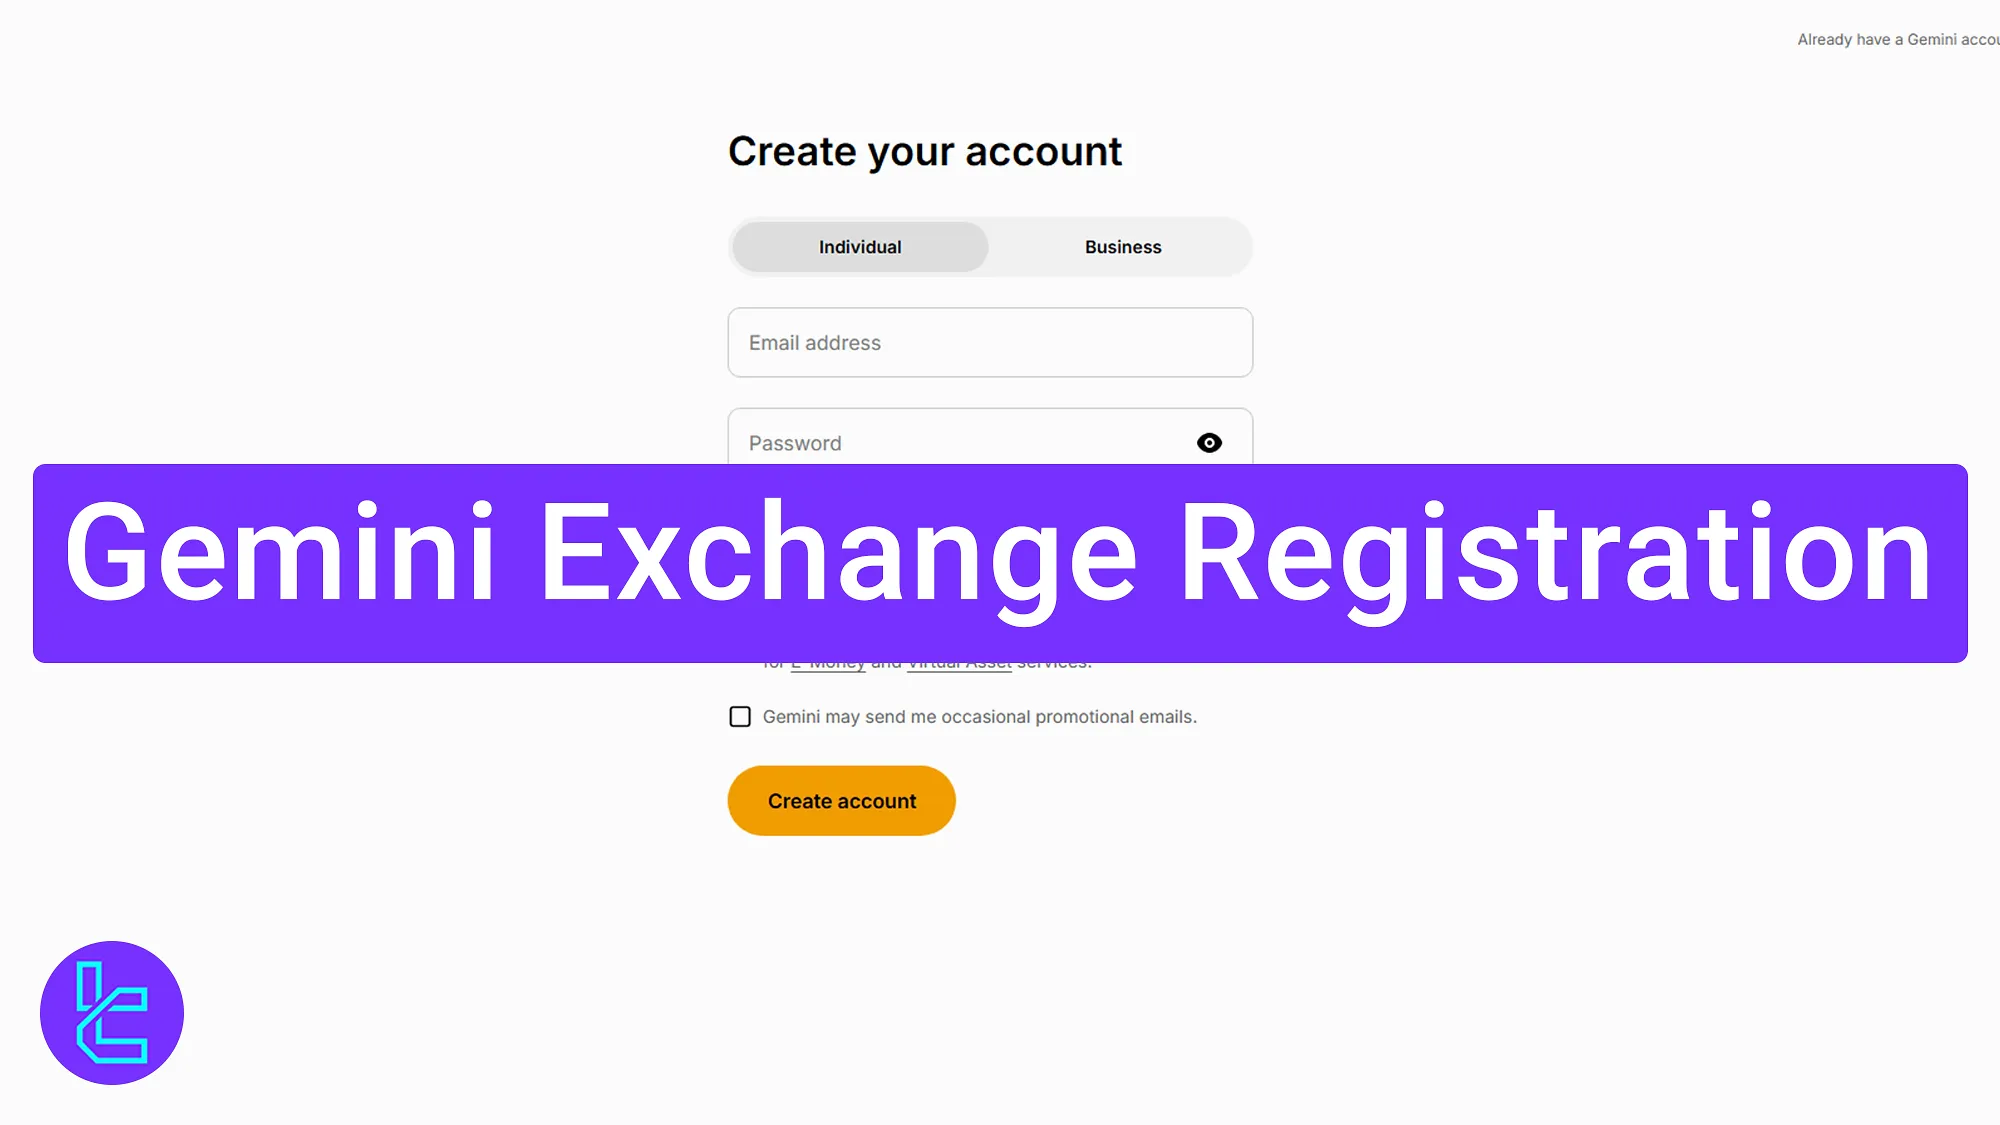
#2 Fill the Signup Form
Choose the account type between "Individual" and "Business". Fill in your email address and create a strong password that includes uppercase and lowercase letters, numbers, and symbols.
Choose your country of residence and preferred language from the dropdown menu. Check the box to agree to the terms and conditions and optionally receive promotional emails.
Click on "Create account" to proceed with your signup process and continue this Gemini exchange tutorial.

#3 Verify email with code
Check your email, copy the 6-digit code from Gemini, and paste it into the account setup page.

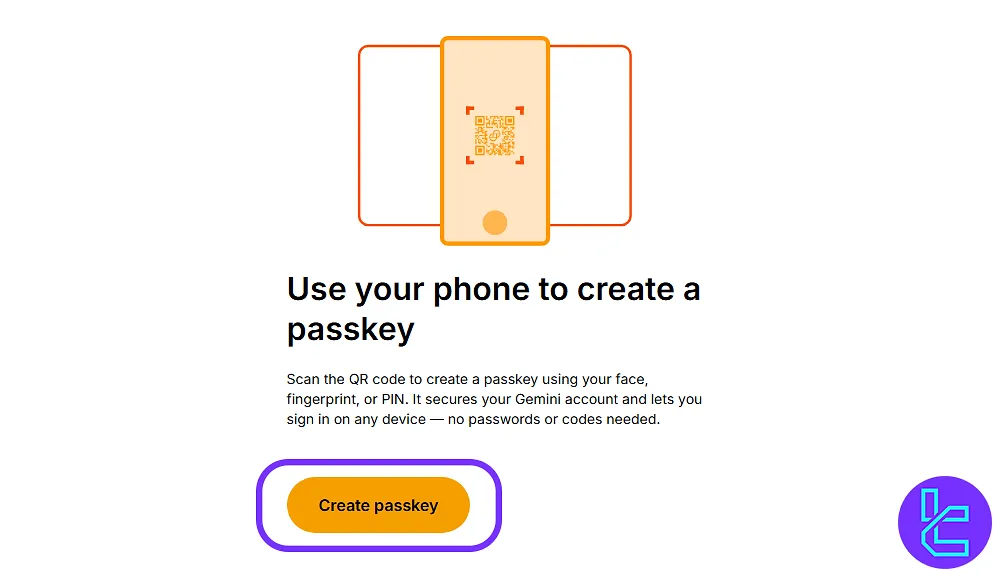
#4 Set up passkey or authenticator
Use your phone to create a passkey, or scan the QR code with an authenticator app for two-factor security. Then, type the 6-digit code generated by your authenticator app to confirm your account.
Review and Comparison of the Gemini Exchange Account setupProcess with Other Platforms
The table below highlights the account creation requirements and verification documents needed to open a Gemini exchange account, compared with the signup steps of other cryptocurrency exchanges.
Registration Requirements | Gemini Exchange | |||
Email Sign-up | Yes | Yes | Yes | Yes |
Phone Number Required | No | No | Yes | No |
Google Account Login | No | Yes | Yes | Yes |
Apple ID Login | No | Yes | Yes | Yes |
Facebook Login | No | No | No | No |
Full Name | No | No | No | No |
Country of Residence | Yes | No | Yes | No |
Date of Birth | No | No | No | No |
Address Details | No | No | No | No |
Email Verification | Yes | Yes | Yes | Yes |
Phone Number Verification | No | No | Yes | No |
Financial Status Questionnaire | No | No | No | No |
Trading Experience Questionnaire | No | No | No | No |
TF Expert Suggestion
Gemini exchange registration usually takes about 5 minutes. You'll begin by entering your email and setting up an authenticator app.
After that, you’ll have immediate access to your personalized Gemini dashboard to start trading.
Once your account is created, the next step is to finish the Gemini exchange verification to activate Visa and MasterCard deposits and withdrawals.


