


Paybis Tether TRC20 Deposit takes less than 3 minutes. You’ll create a wallet, copy or scan the TRC20 address, and transfer the funds from your personal wallet.

Paybis USDT TRC20 Payment Overview
To transfer USDT TRC20 into Paybis exchange, follow these 4 steps:
- Open the “Wallet” section and create a USDT wallet;
- Click “Deposit” and copy the address;
- Send funds via personal wallet;
- View balance and transaction history.
Ensure you complete Paybis verification to have a more secure address to the website.
#1 Open Paybis Wallet Section and Create USDT Wallet
Navigate to the “Wallet” section and create your Tether TRC20 wallet in this cryptocurrency exchange.
- Click “Add Wallet”;
- Search for USDT and choose the Tron network;
- Name your wallet and click “Create”.

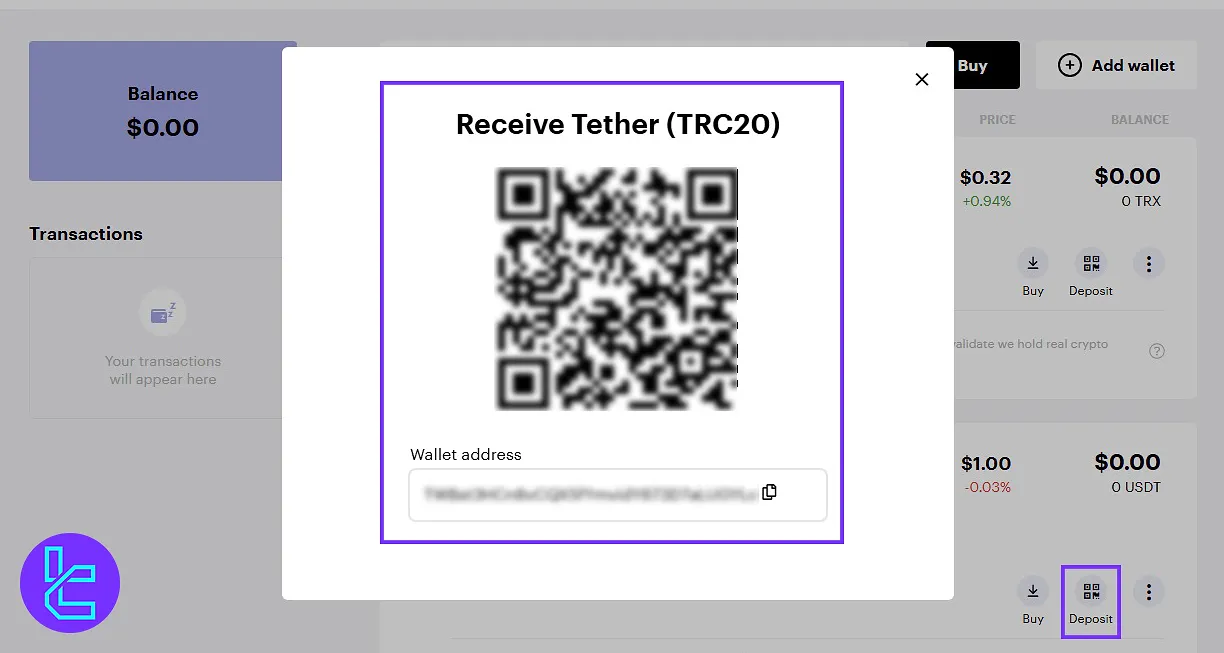
#2 Click “Deposit” and Copy Address on Paybis
Once your wallet is created, click “Deposit” to display the destination address, then:
- Copy the TRC20 address shown;
- You can also use the QR code.
#3 Send Funds to Paybis via Personal Wallet
Open your wallet app, choose TRC20 USDT, and click “Send”.
- Paste the destination address;
- Enter the amount (minimum 5 USDT);
- Or scan the QR code.
Click “Next”, then “Confirm”. You’ll see all key transaction info:
- Source and destination address
- Transaction fee and total
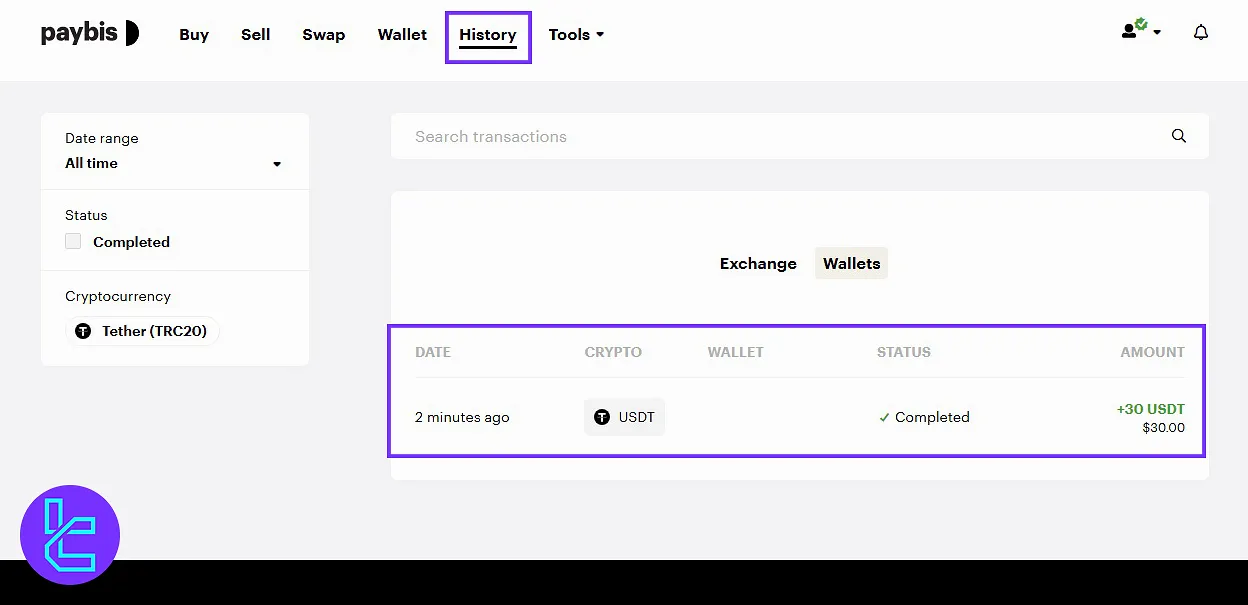
#4 View Balance and Paybis History
After a few minutes, check the wallet balance. You can also go to the “History” section to view the funding details.
Conclusion and Final Words
Paybis Tether TRC20 deposit is now completed in 4 steps. Always check the “History” section to see records categorized by date, crypto type, status, and transferred amount.
To transfer funds using the Ethereum network, check out the Paybis Tether ERC20 deposit guide from the most recent articles on the Paybis tutorials page.


